Building the device
If you received an unassembled Friend or want to build one yourself, follow the steps below:
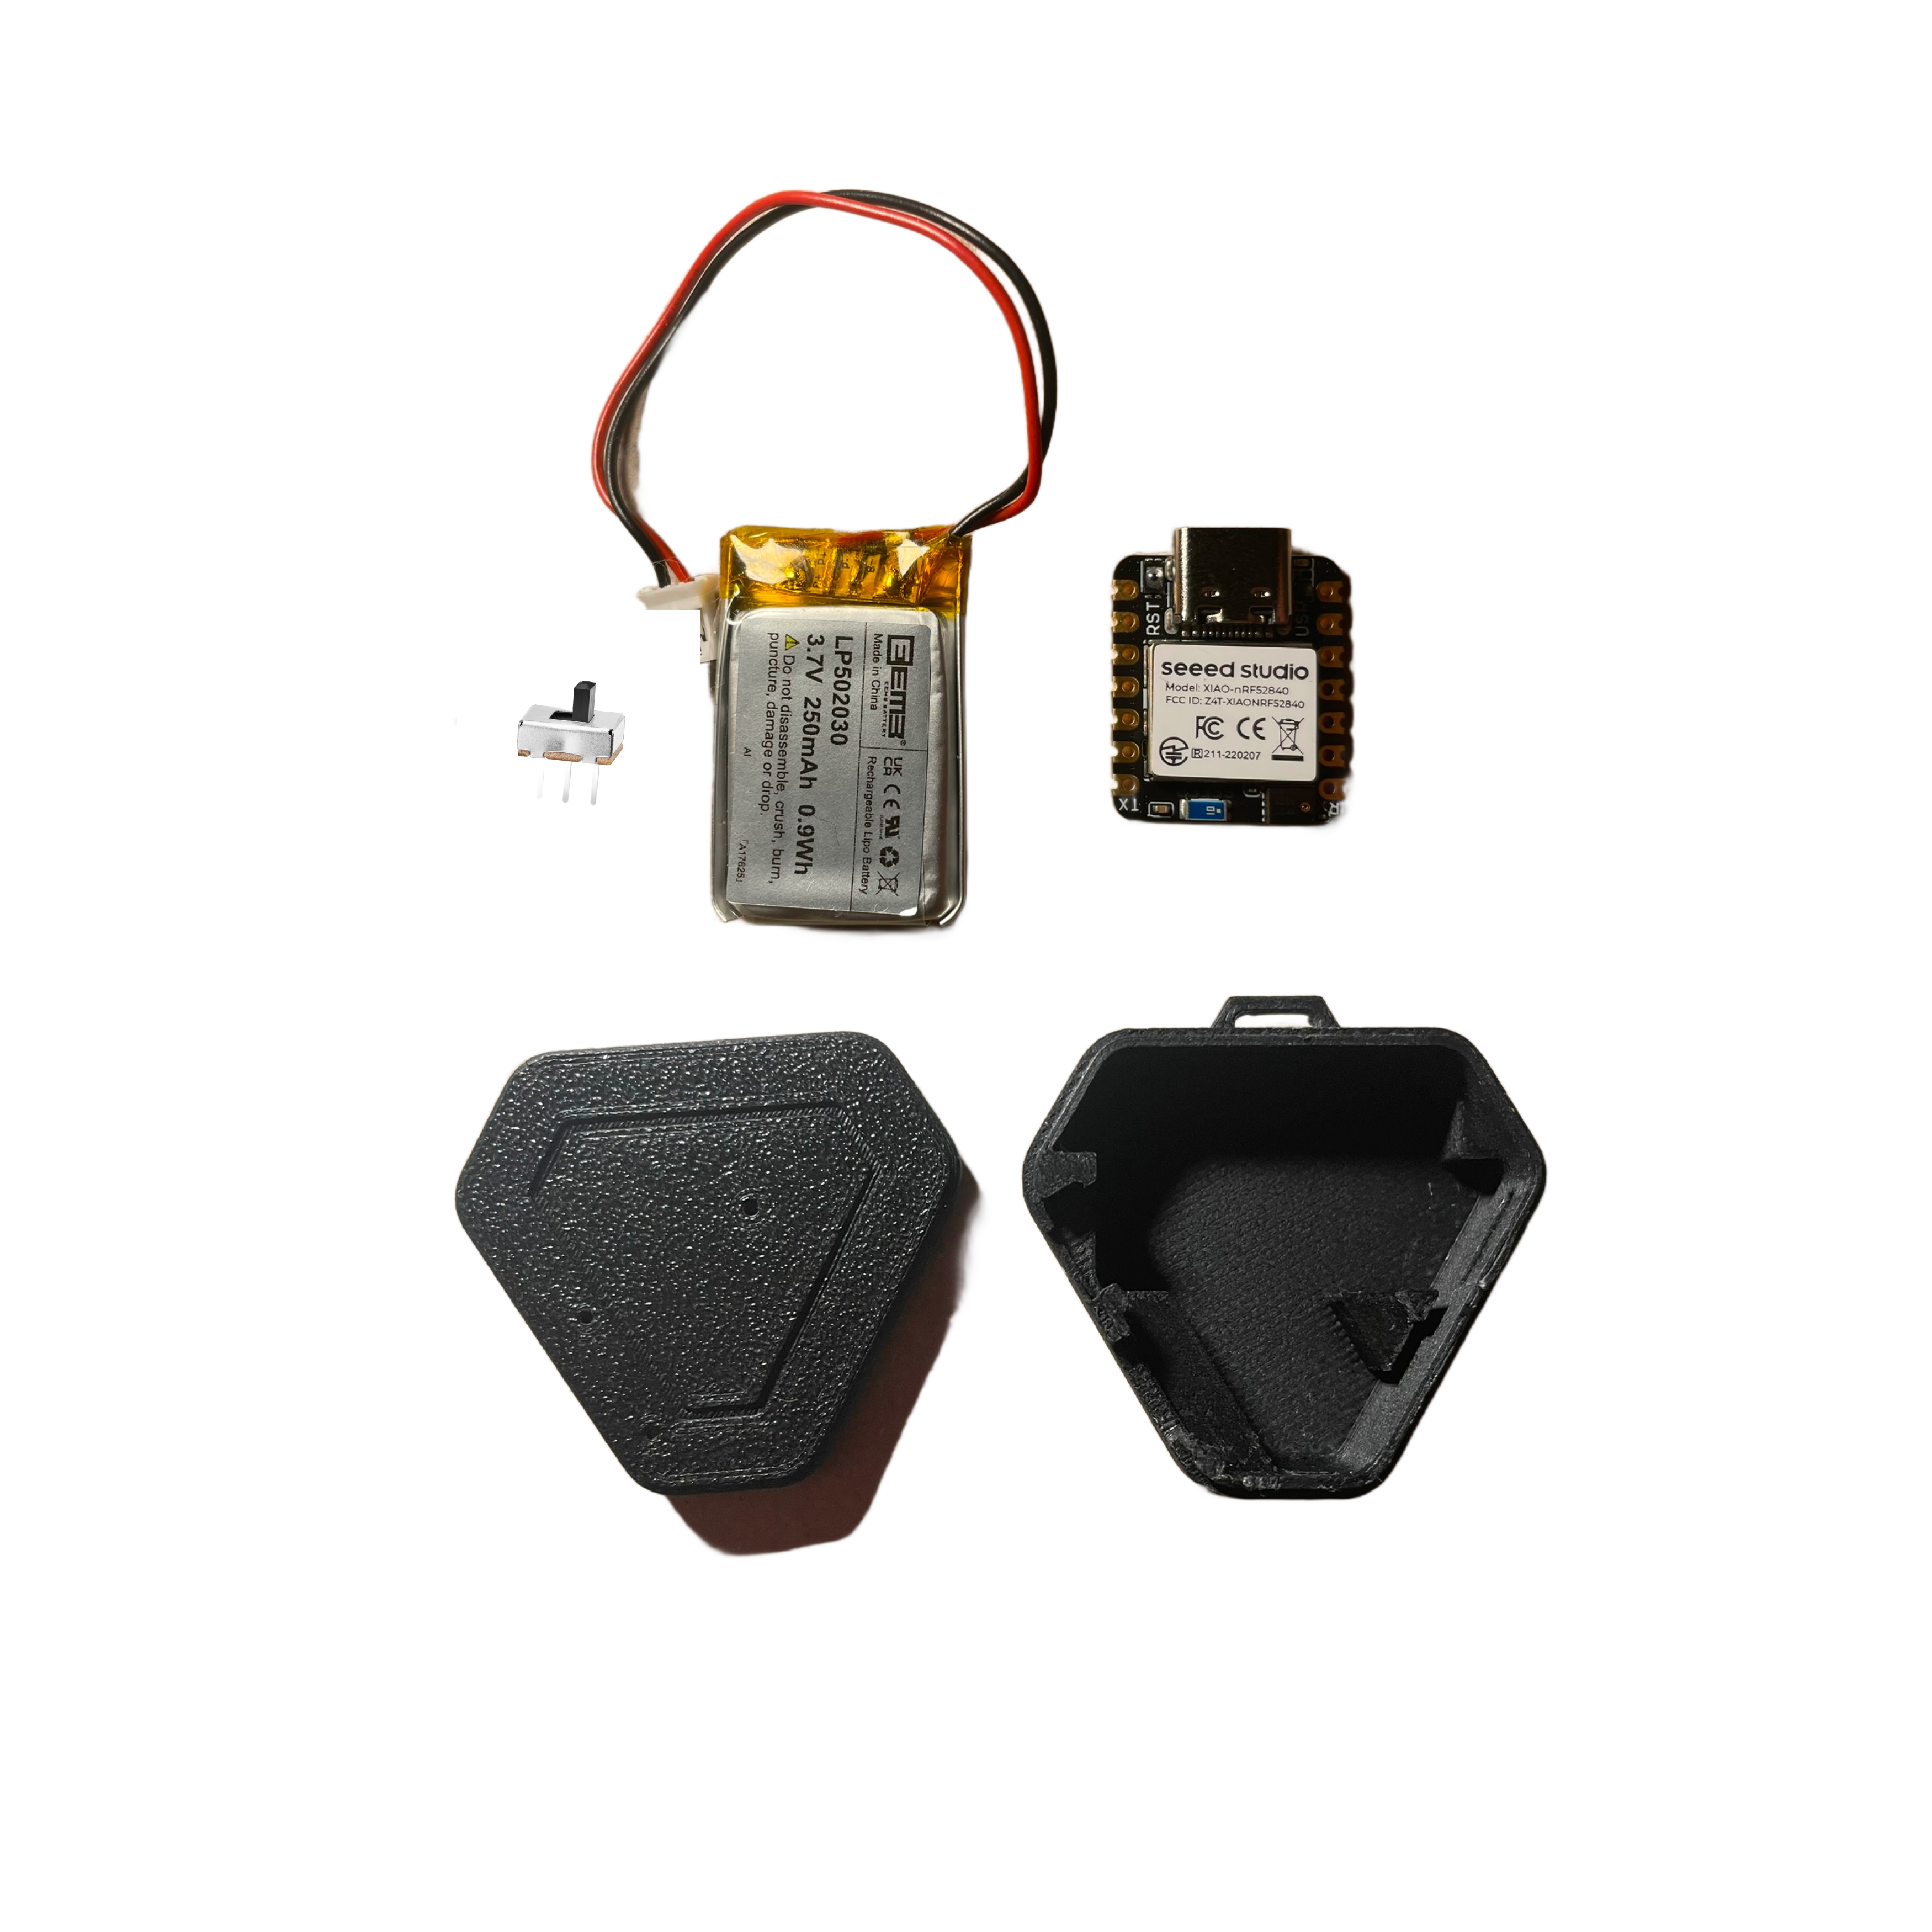
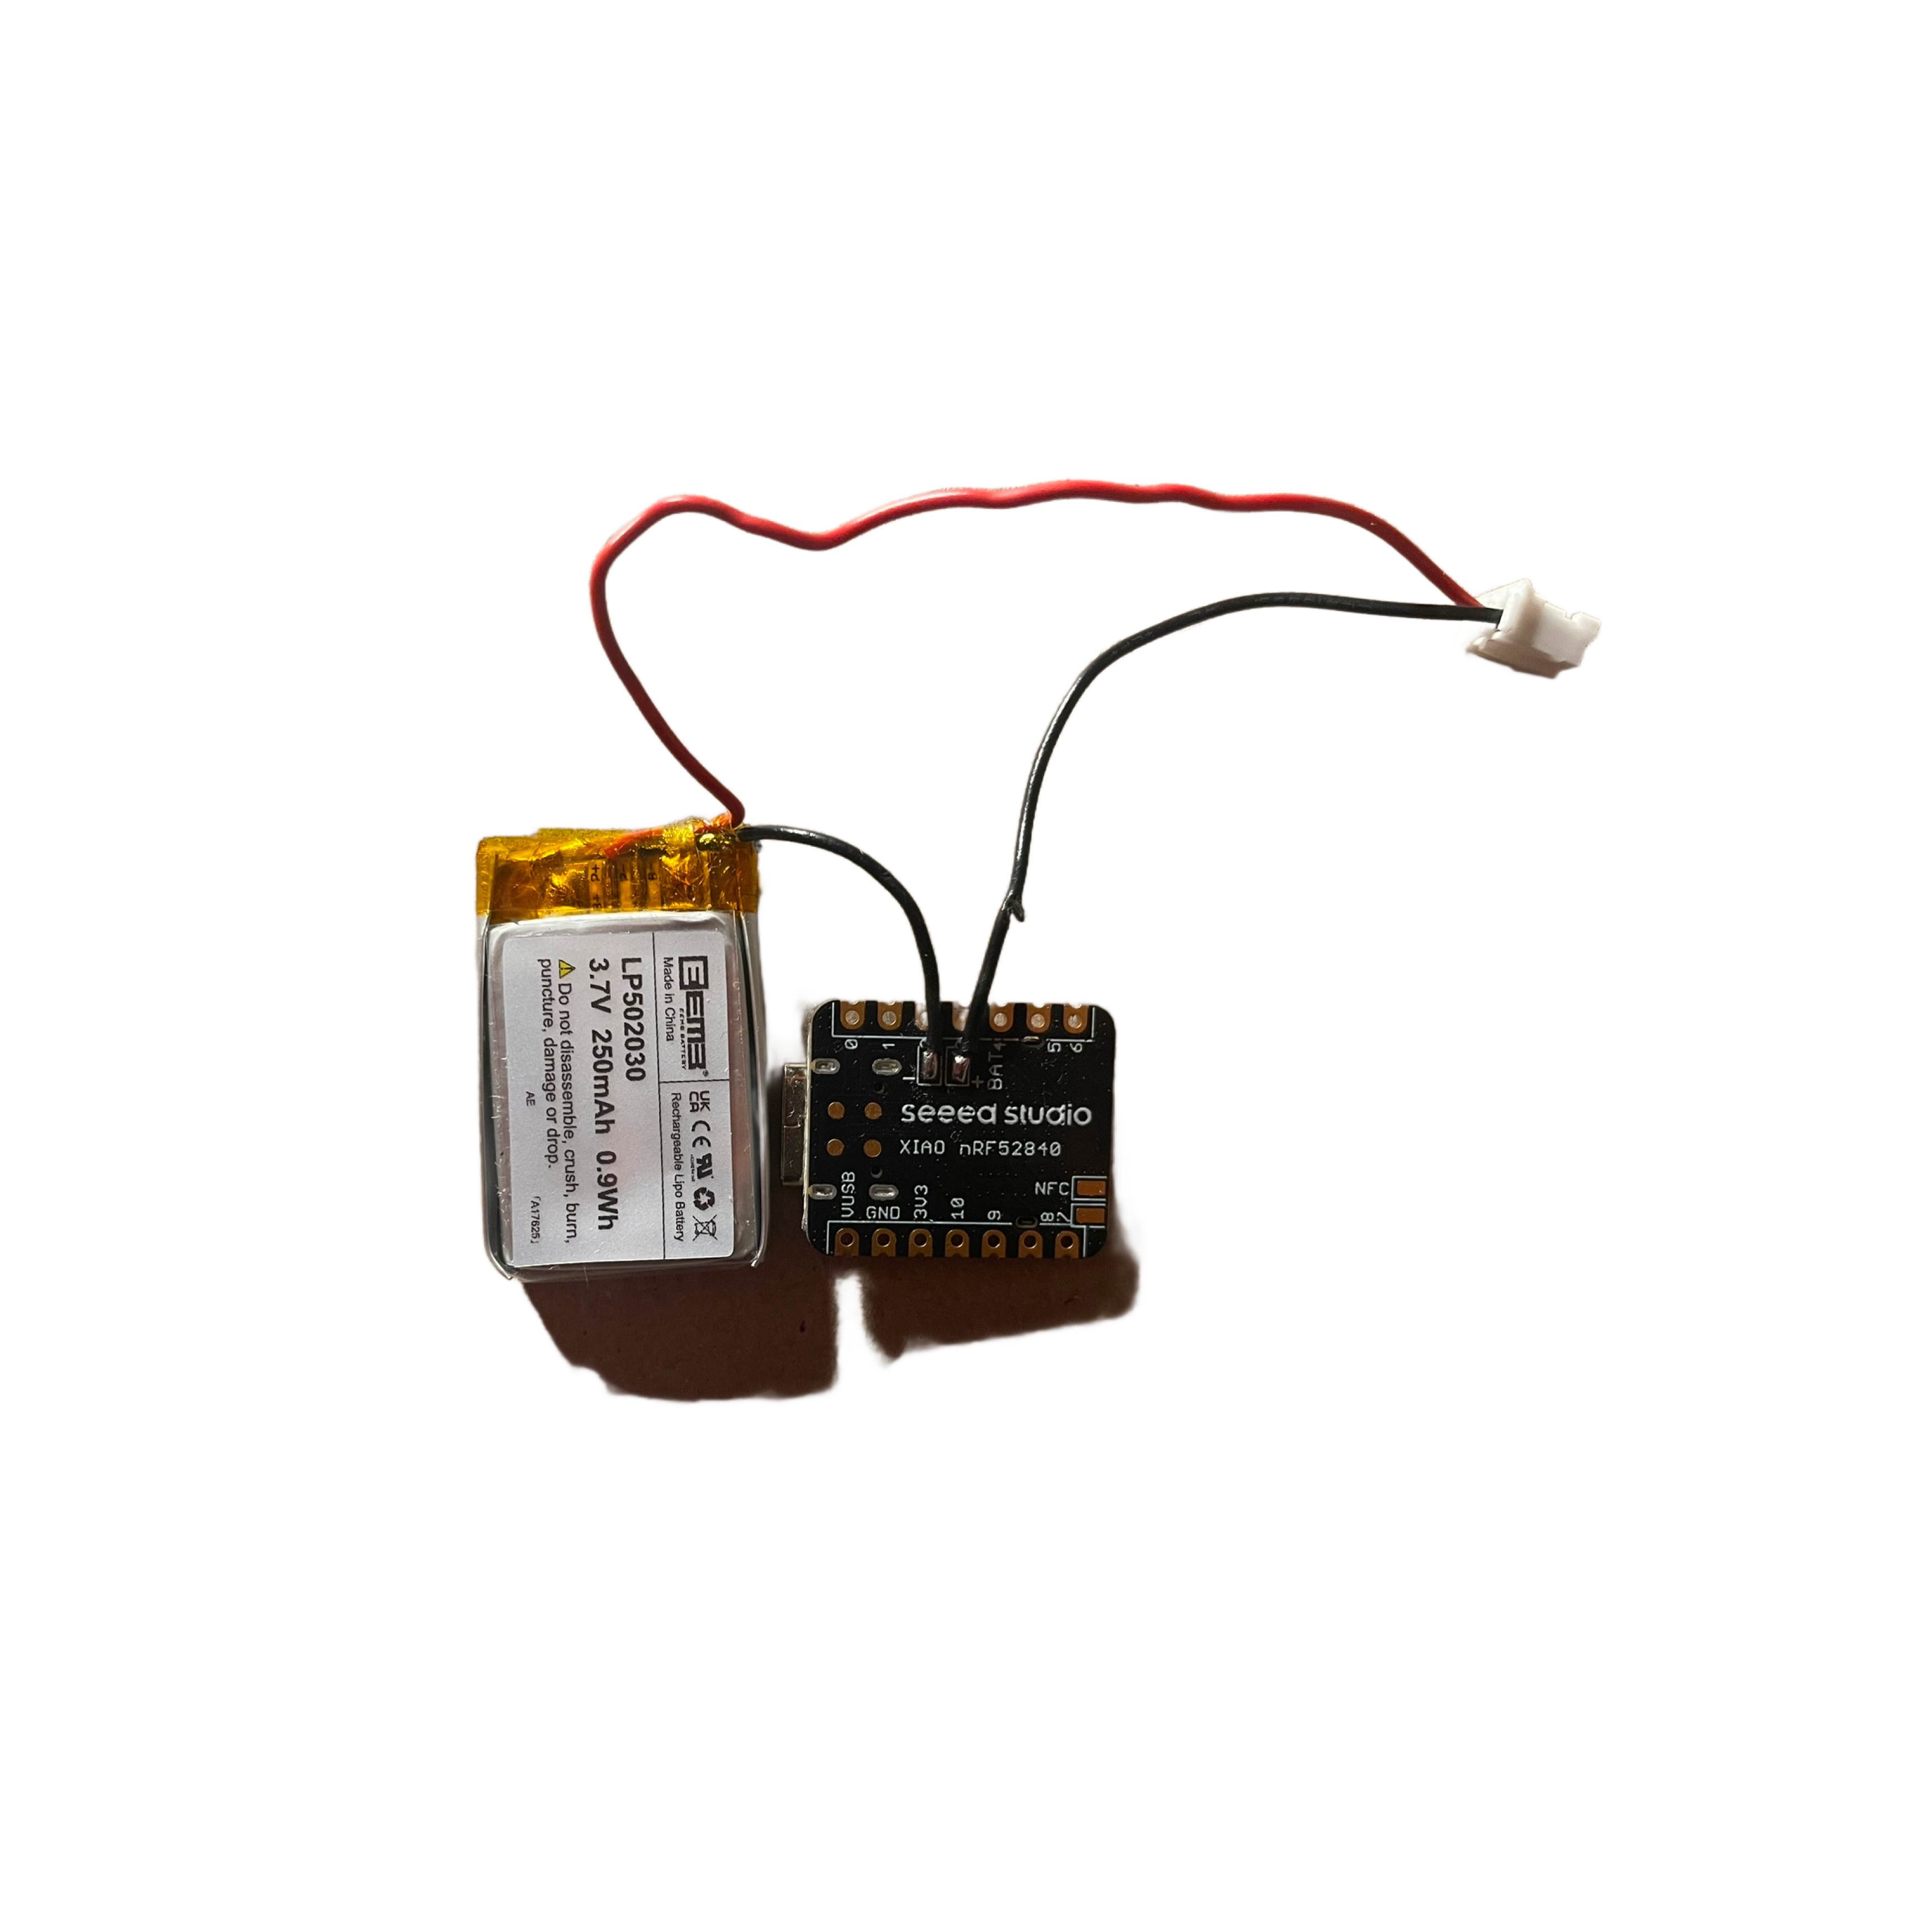
Step 0. Components
Ensure you’ve purchased all required components from the buying guide)
Download and print the case from the provided .stl file link.
If you don’t have access to a 3D printer, send the file to a 3D printing service or check https://makerspace.com/ for 3D printing spaces.
Step 1. Cut the black wire approximately 2/3” from the base.

Step 2. Carefully remove just a little bit of insulation from both ends of the cut wire.
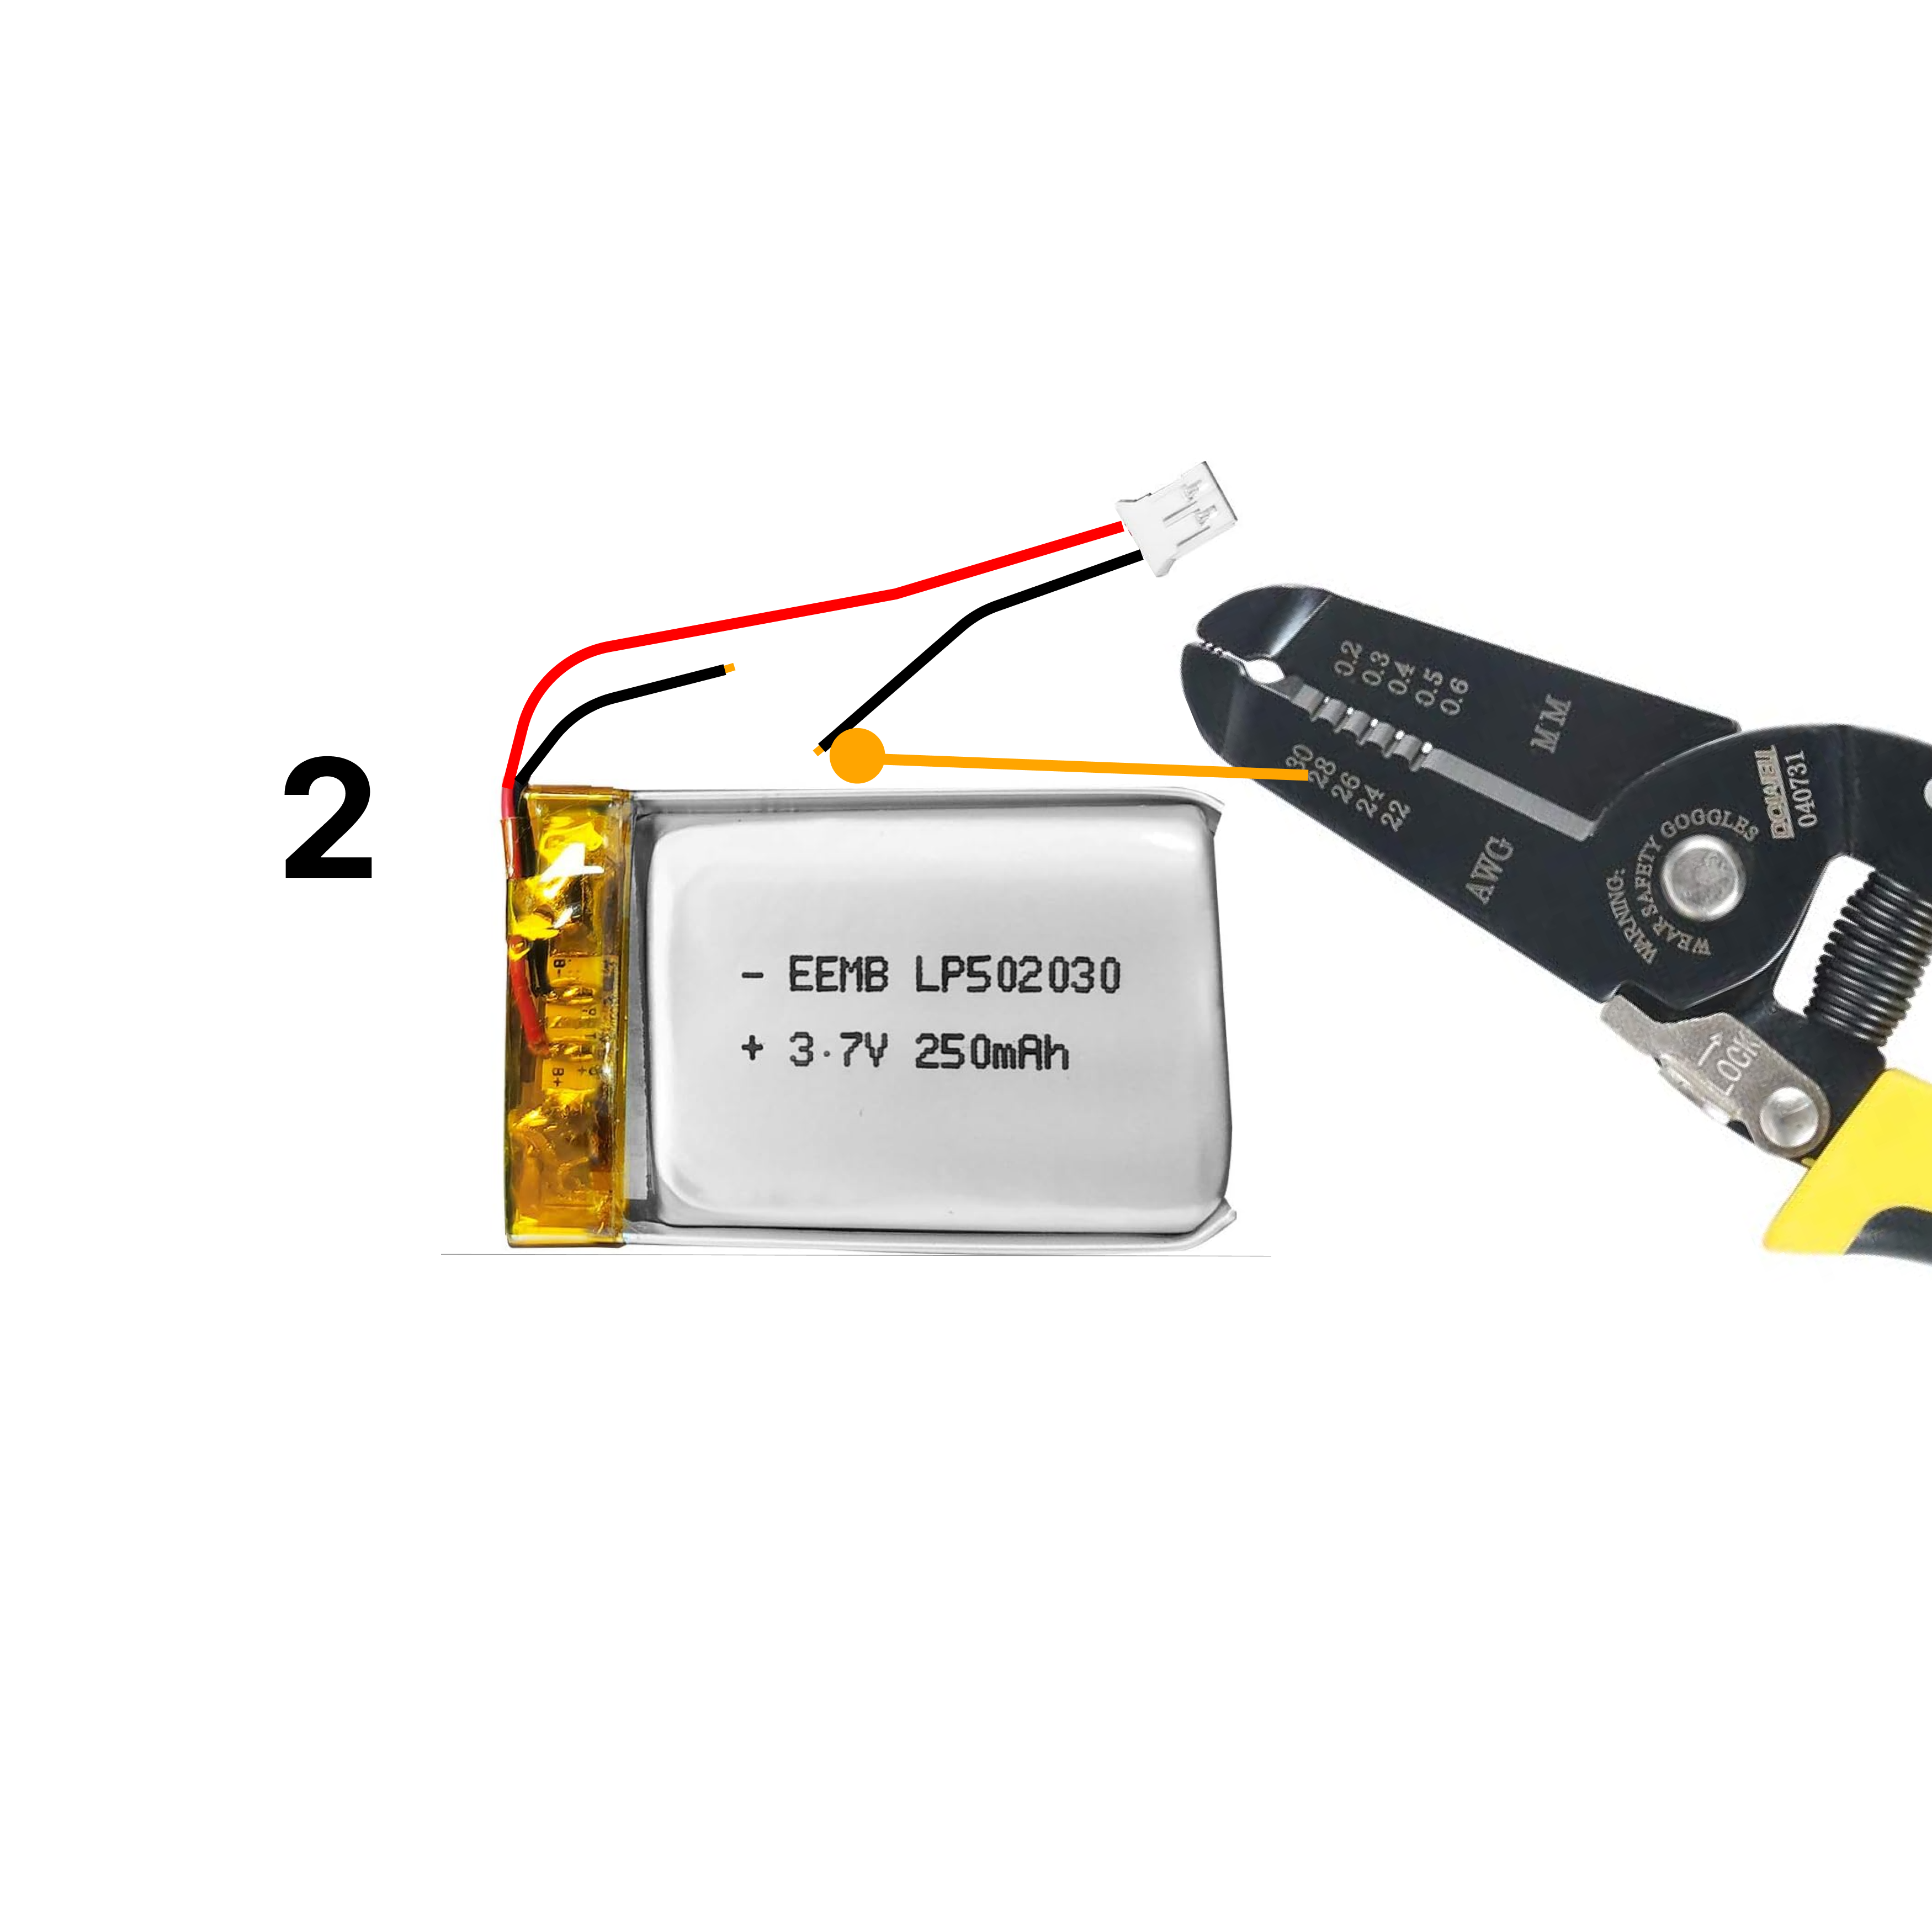
The wire stripper should have multiple notches labelled with AWG sizes. For this project, we recommend using 28 AWG.
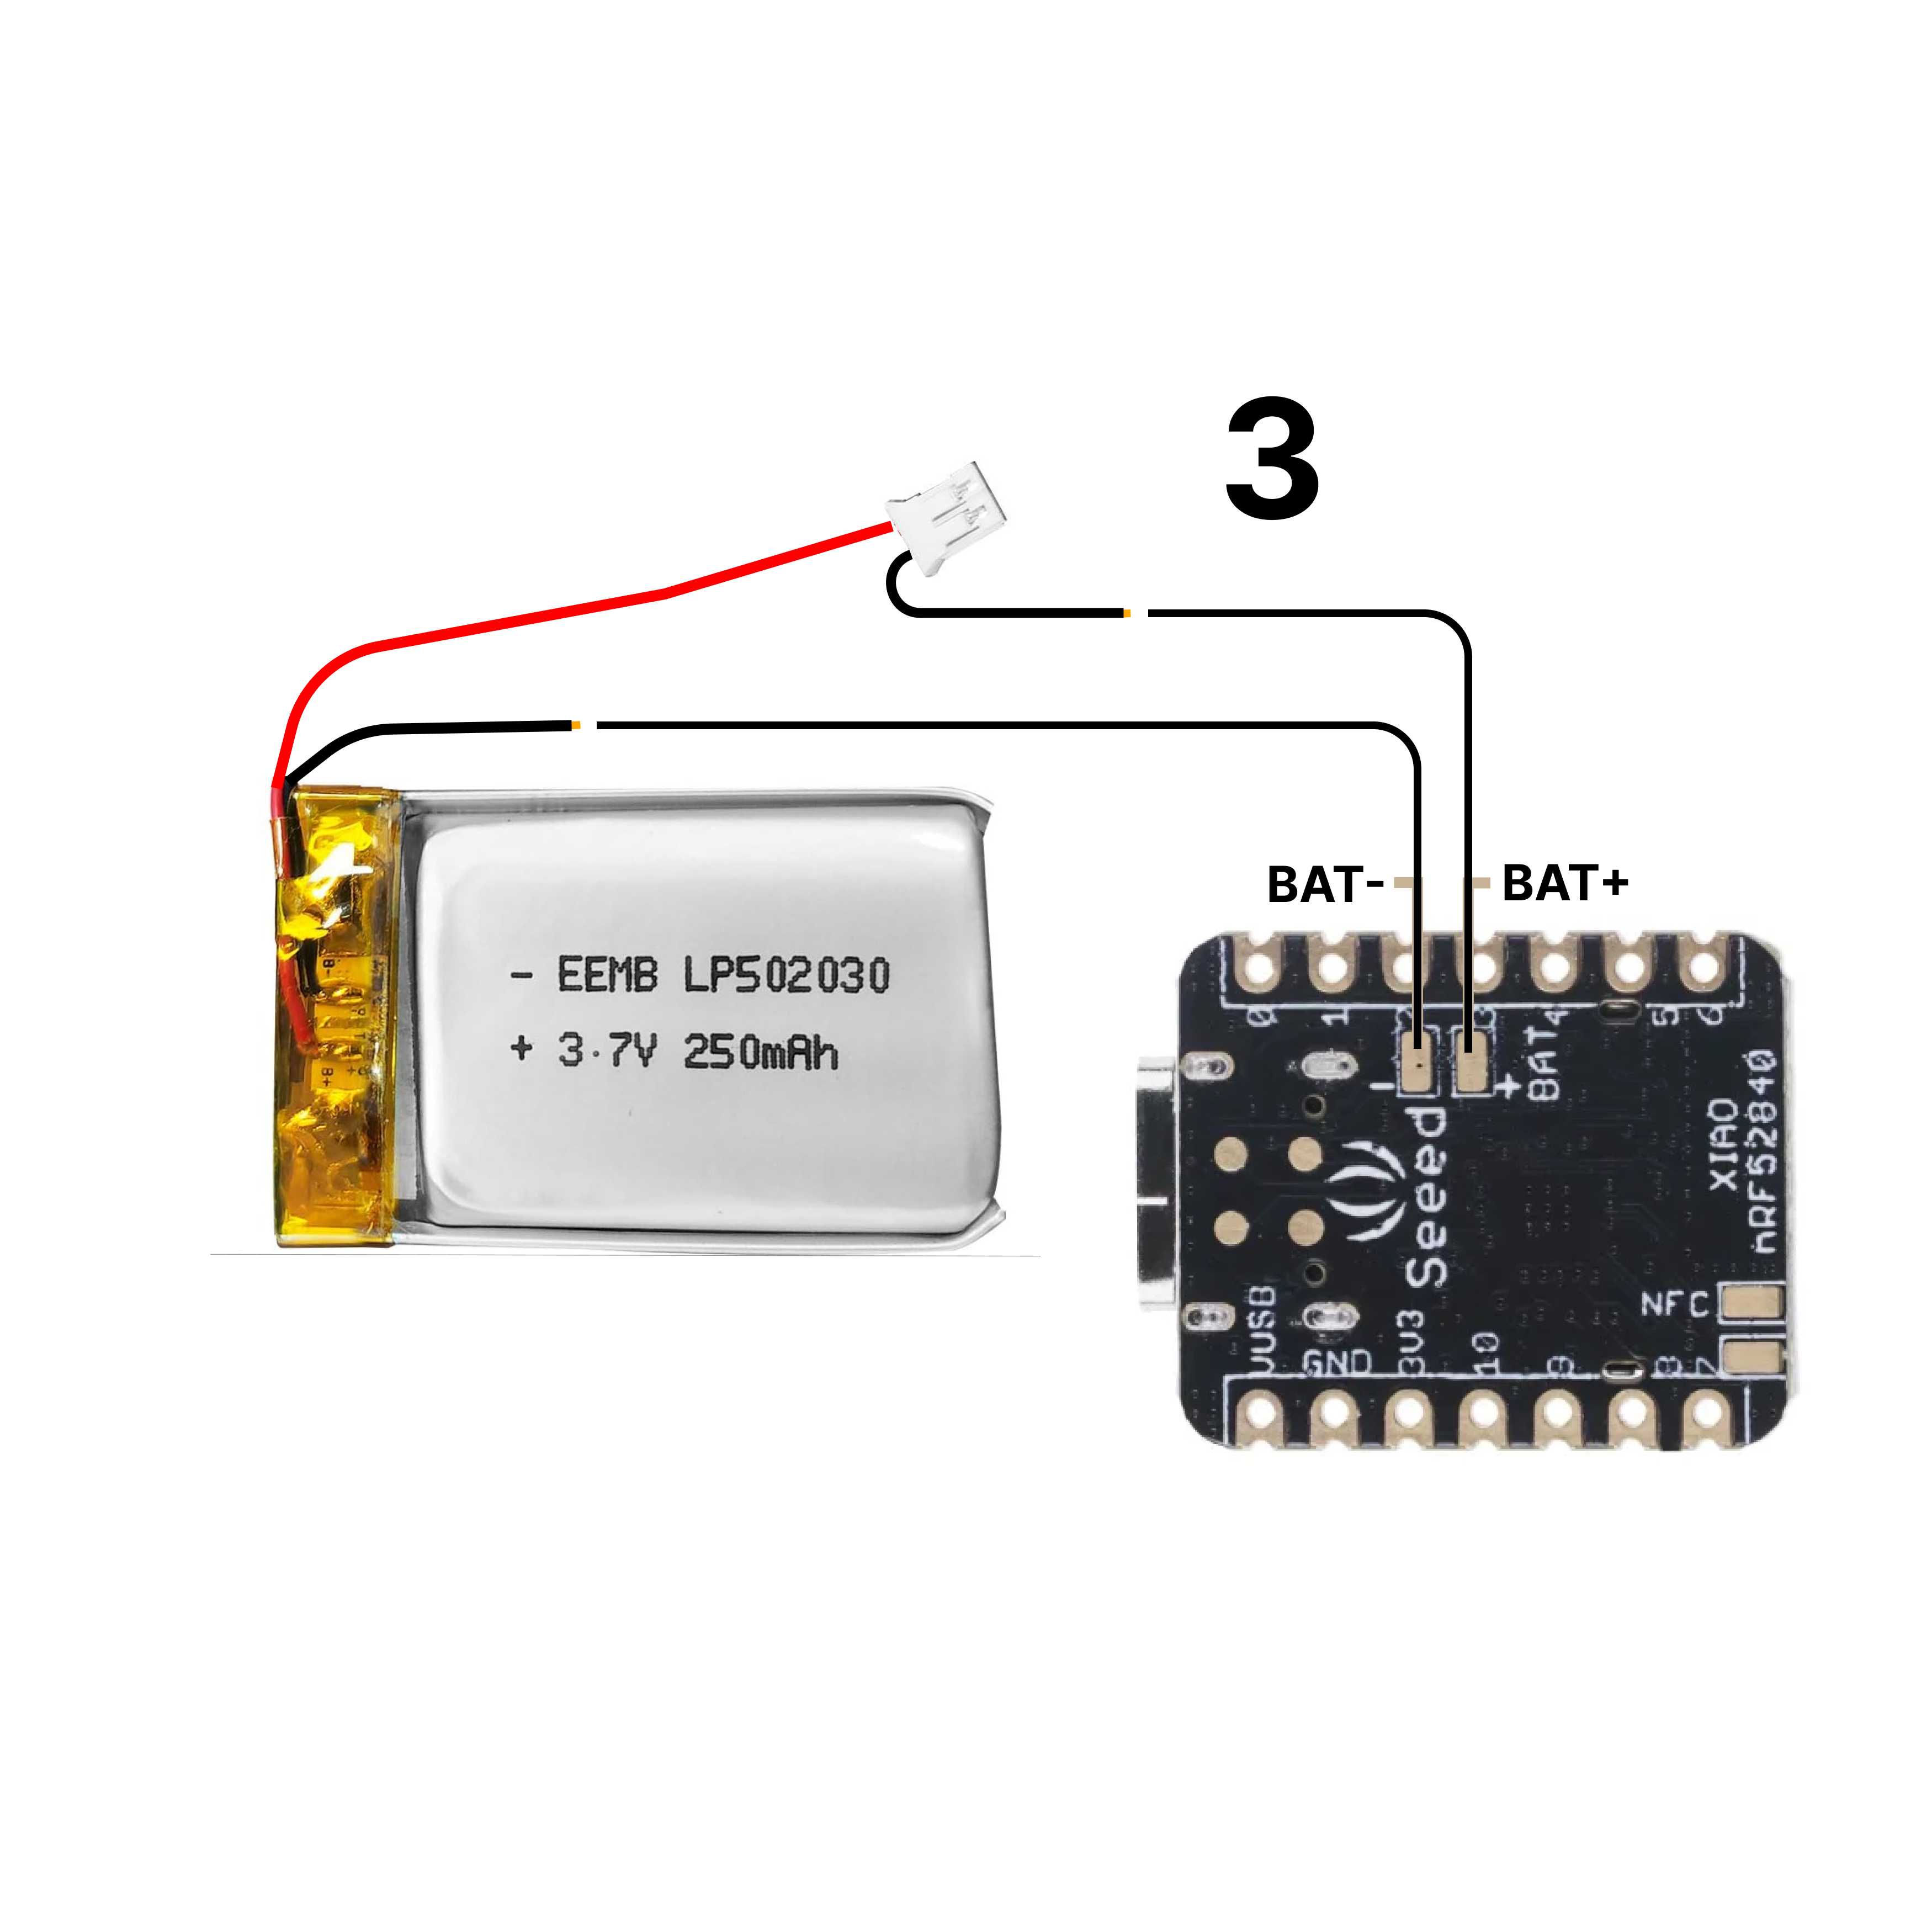
Step 3. Follow the soldering diagram to connect the battery and board.
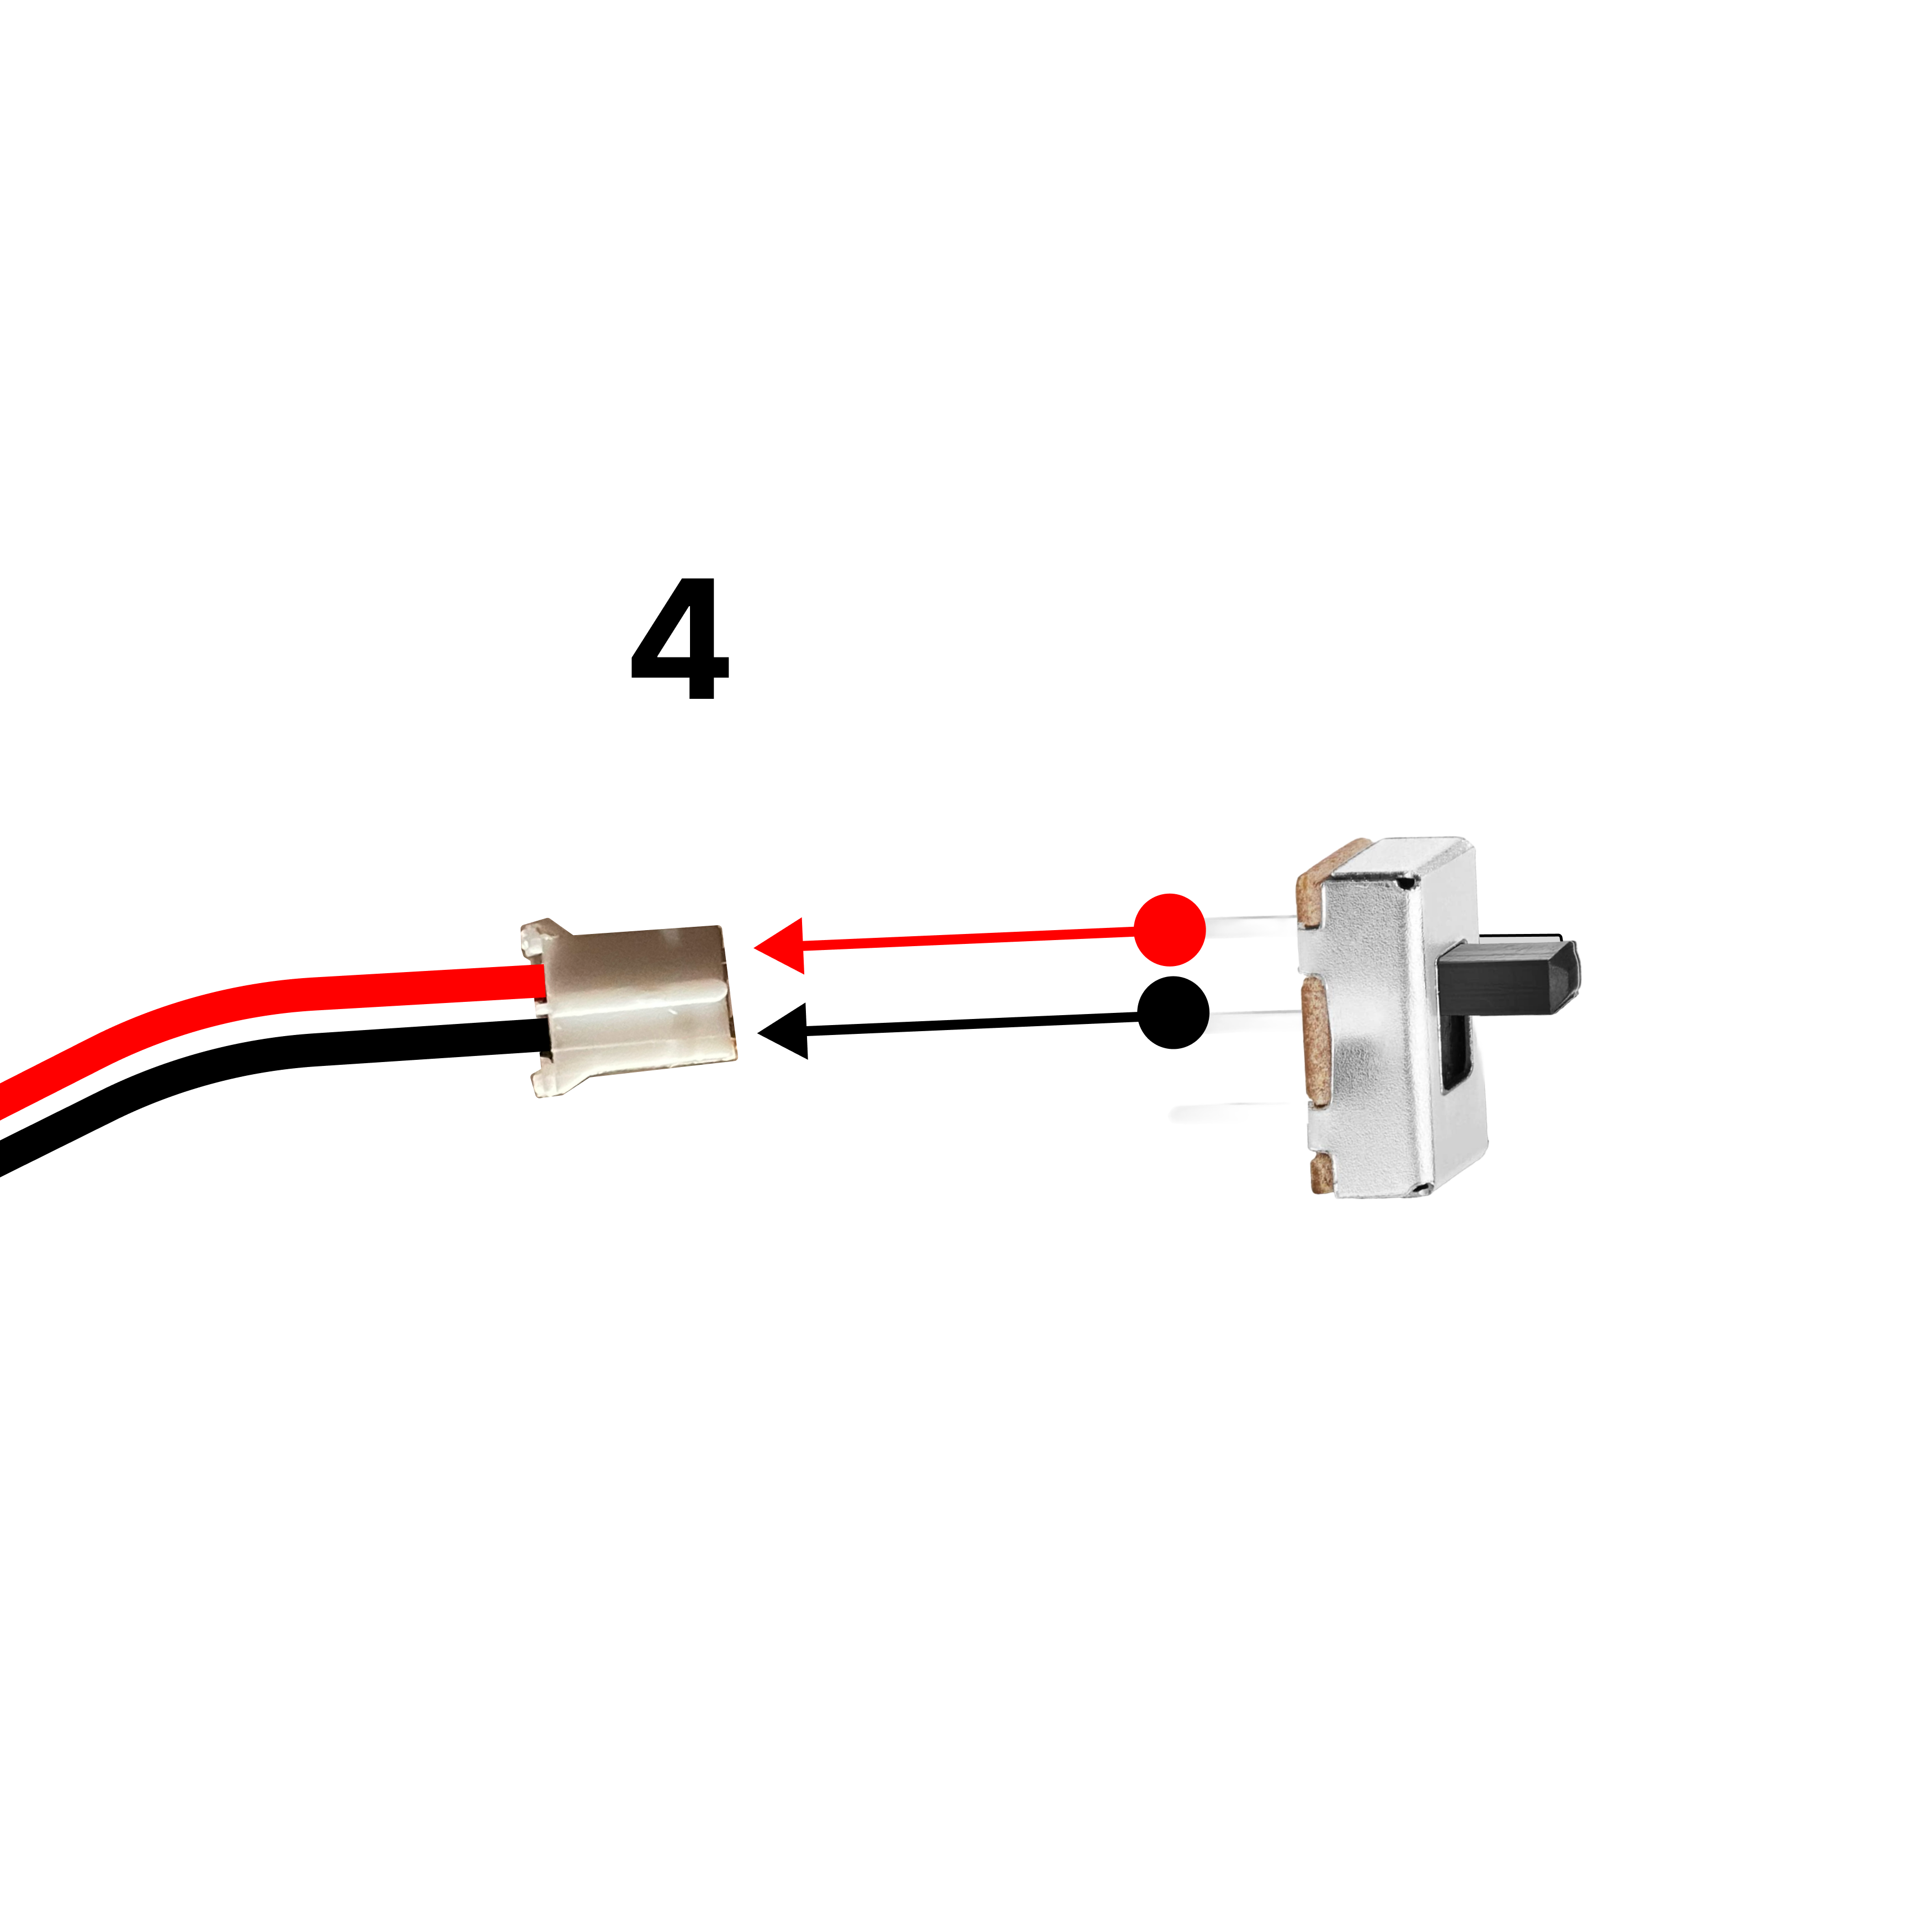
Step 4. Ensure the switch is inserted securely into the battery connector.
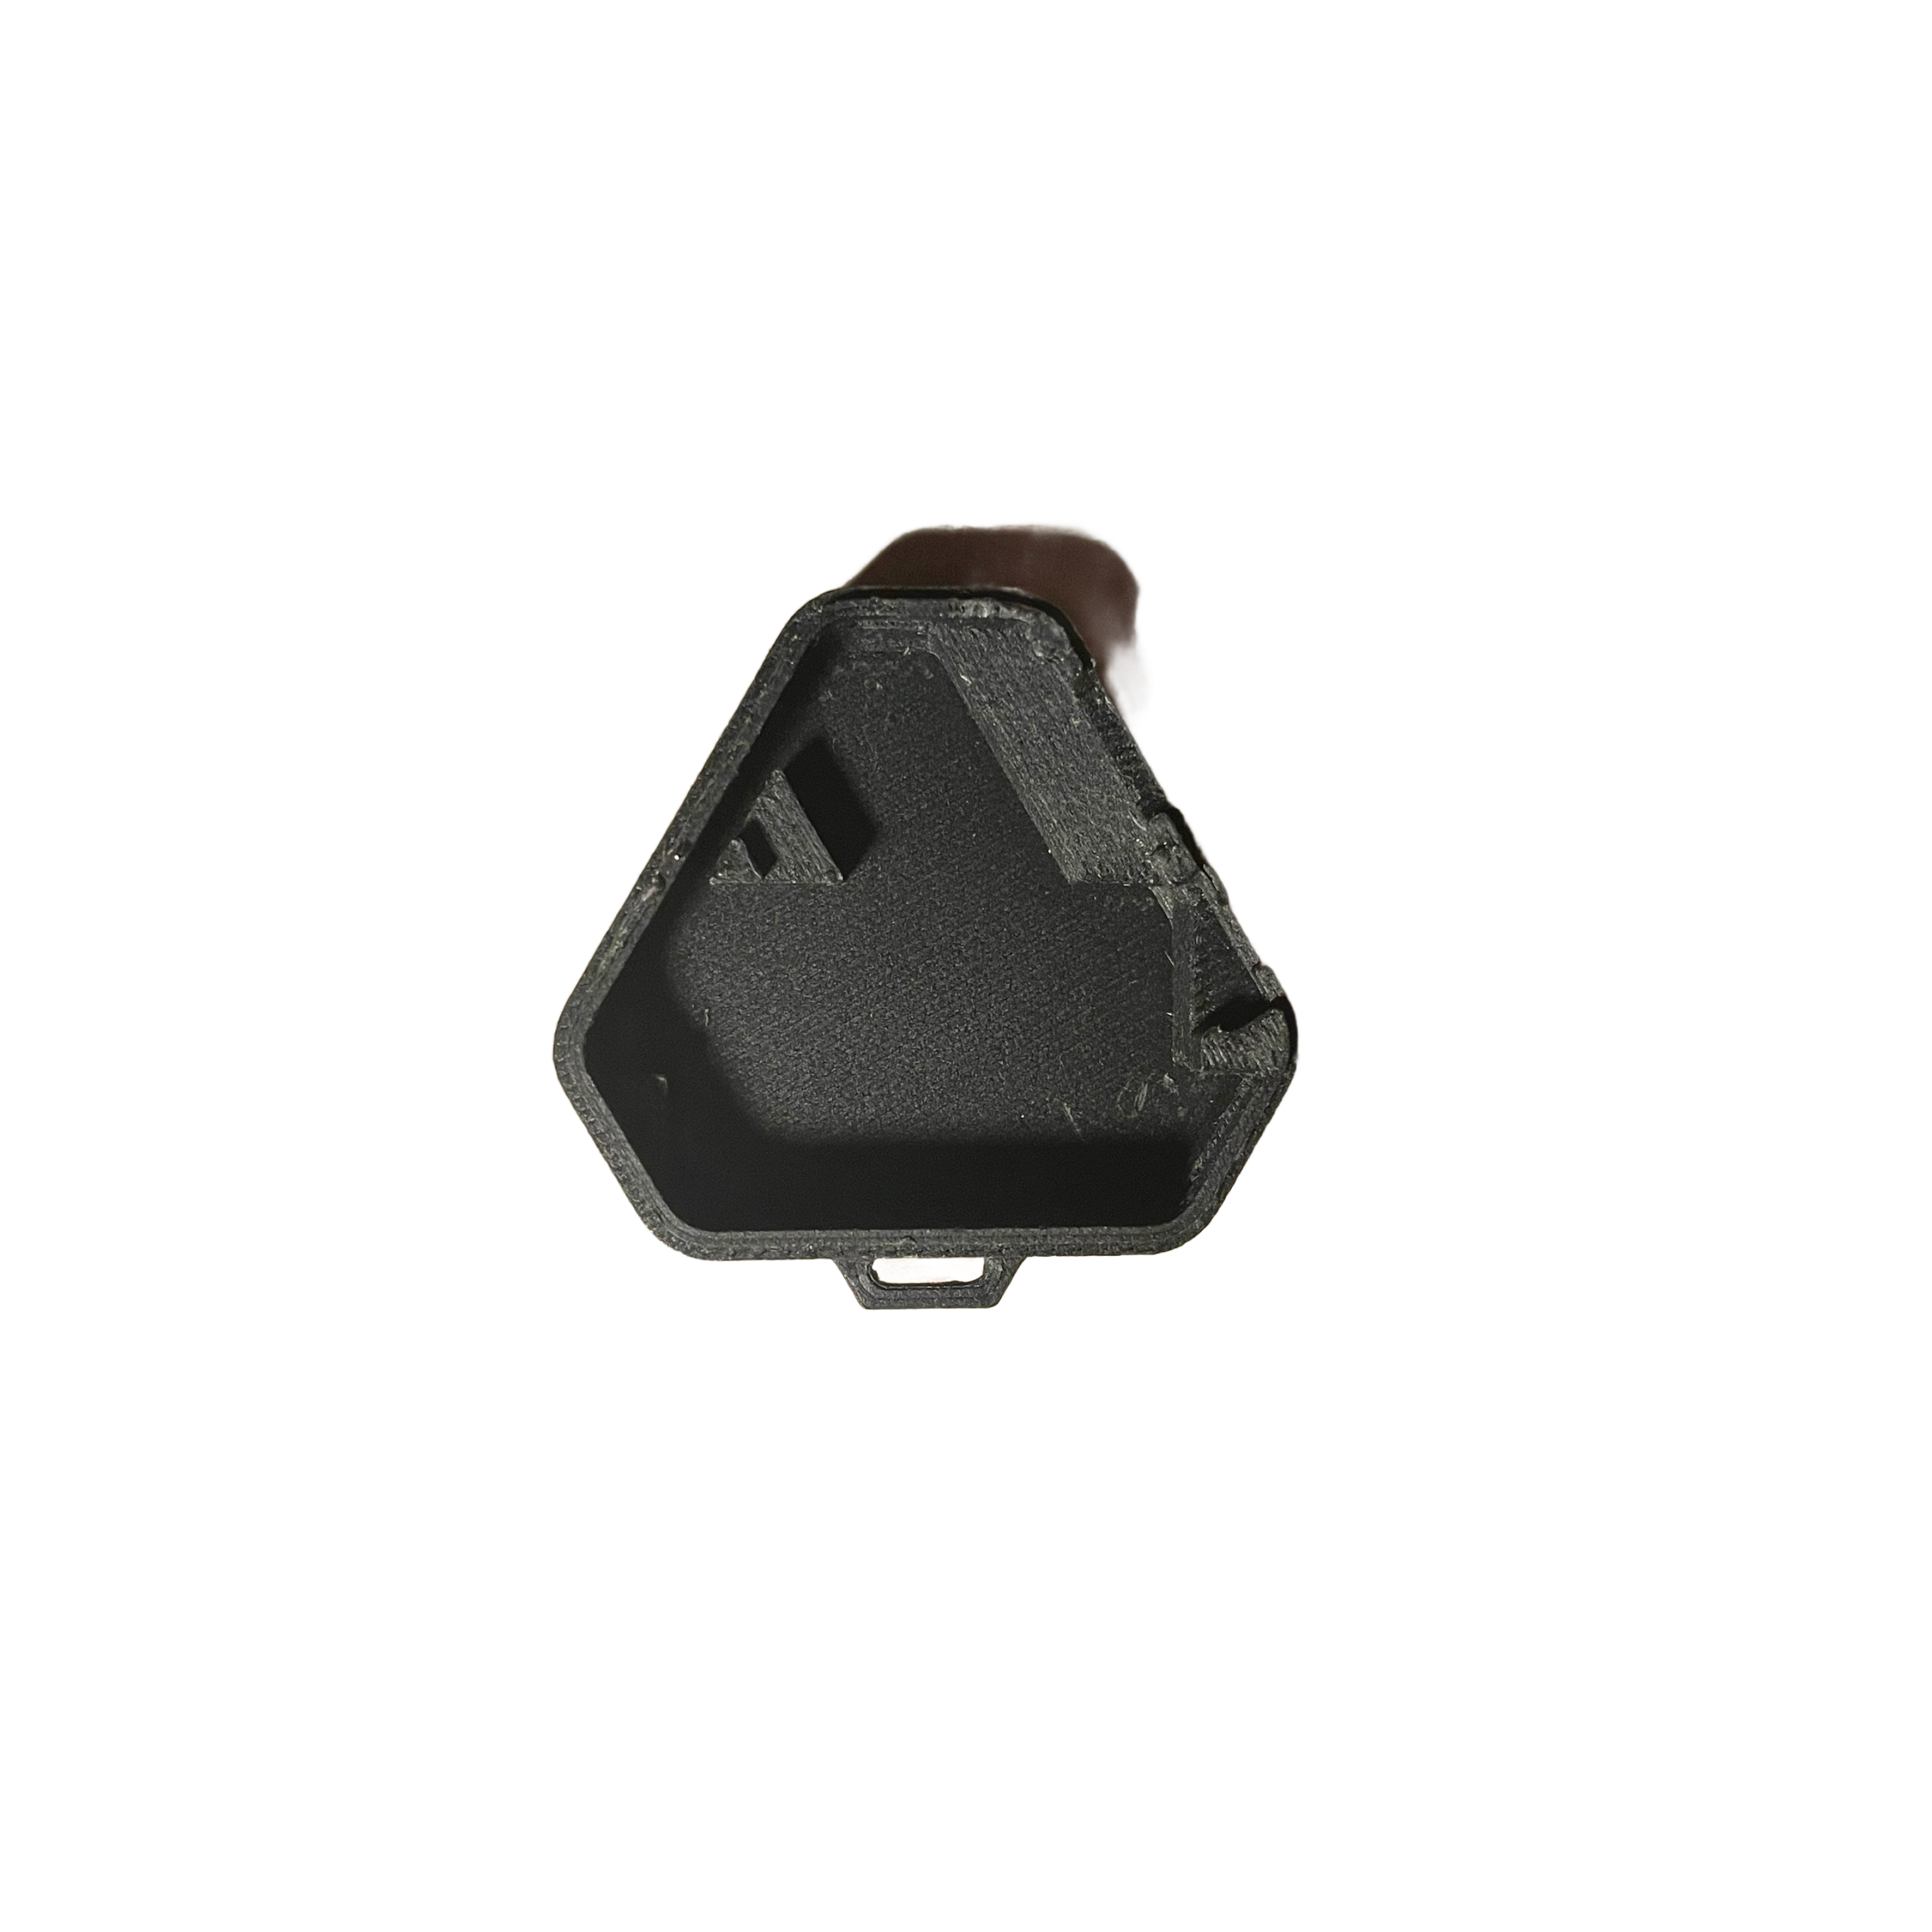
Step 5. Assemble the battery and board in the 3D printed case.
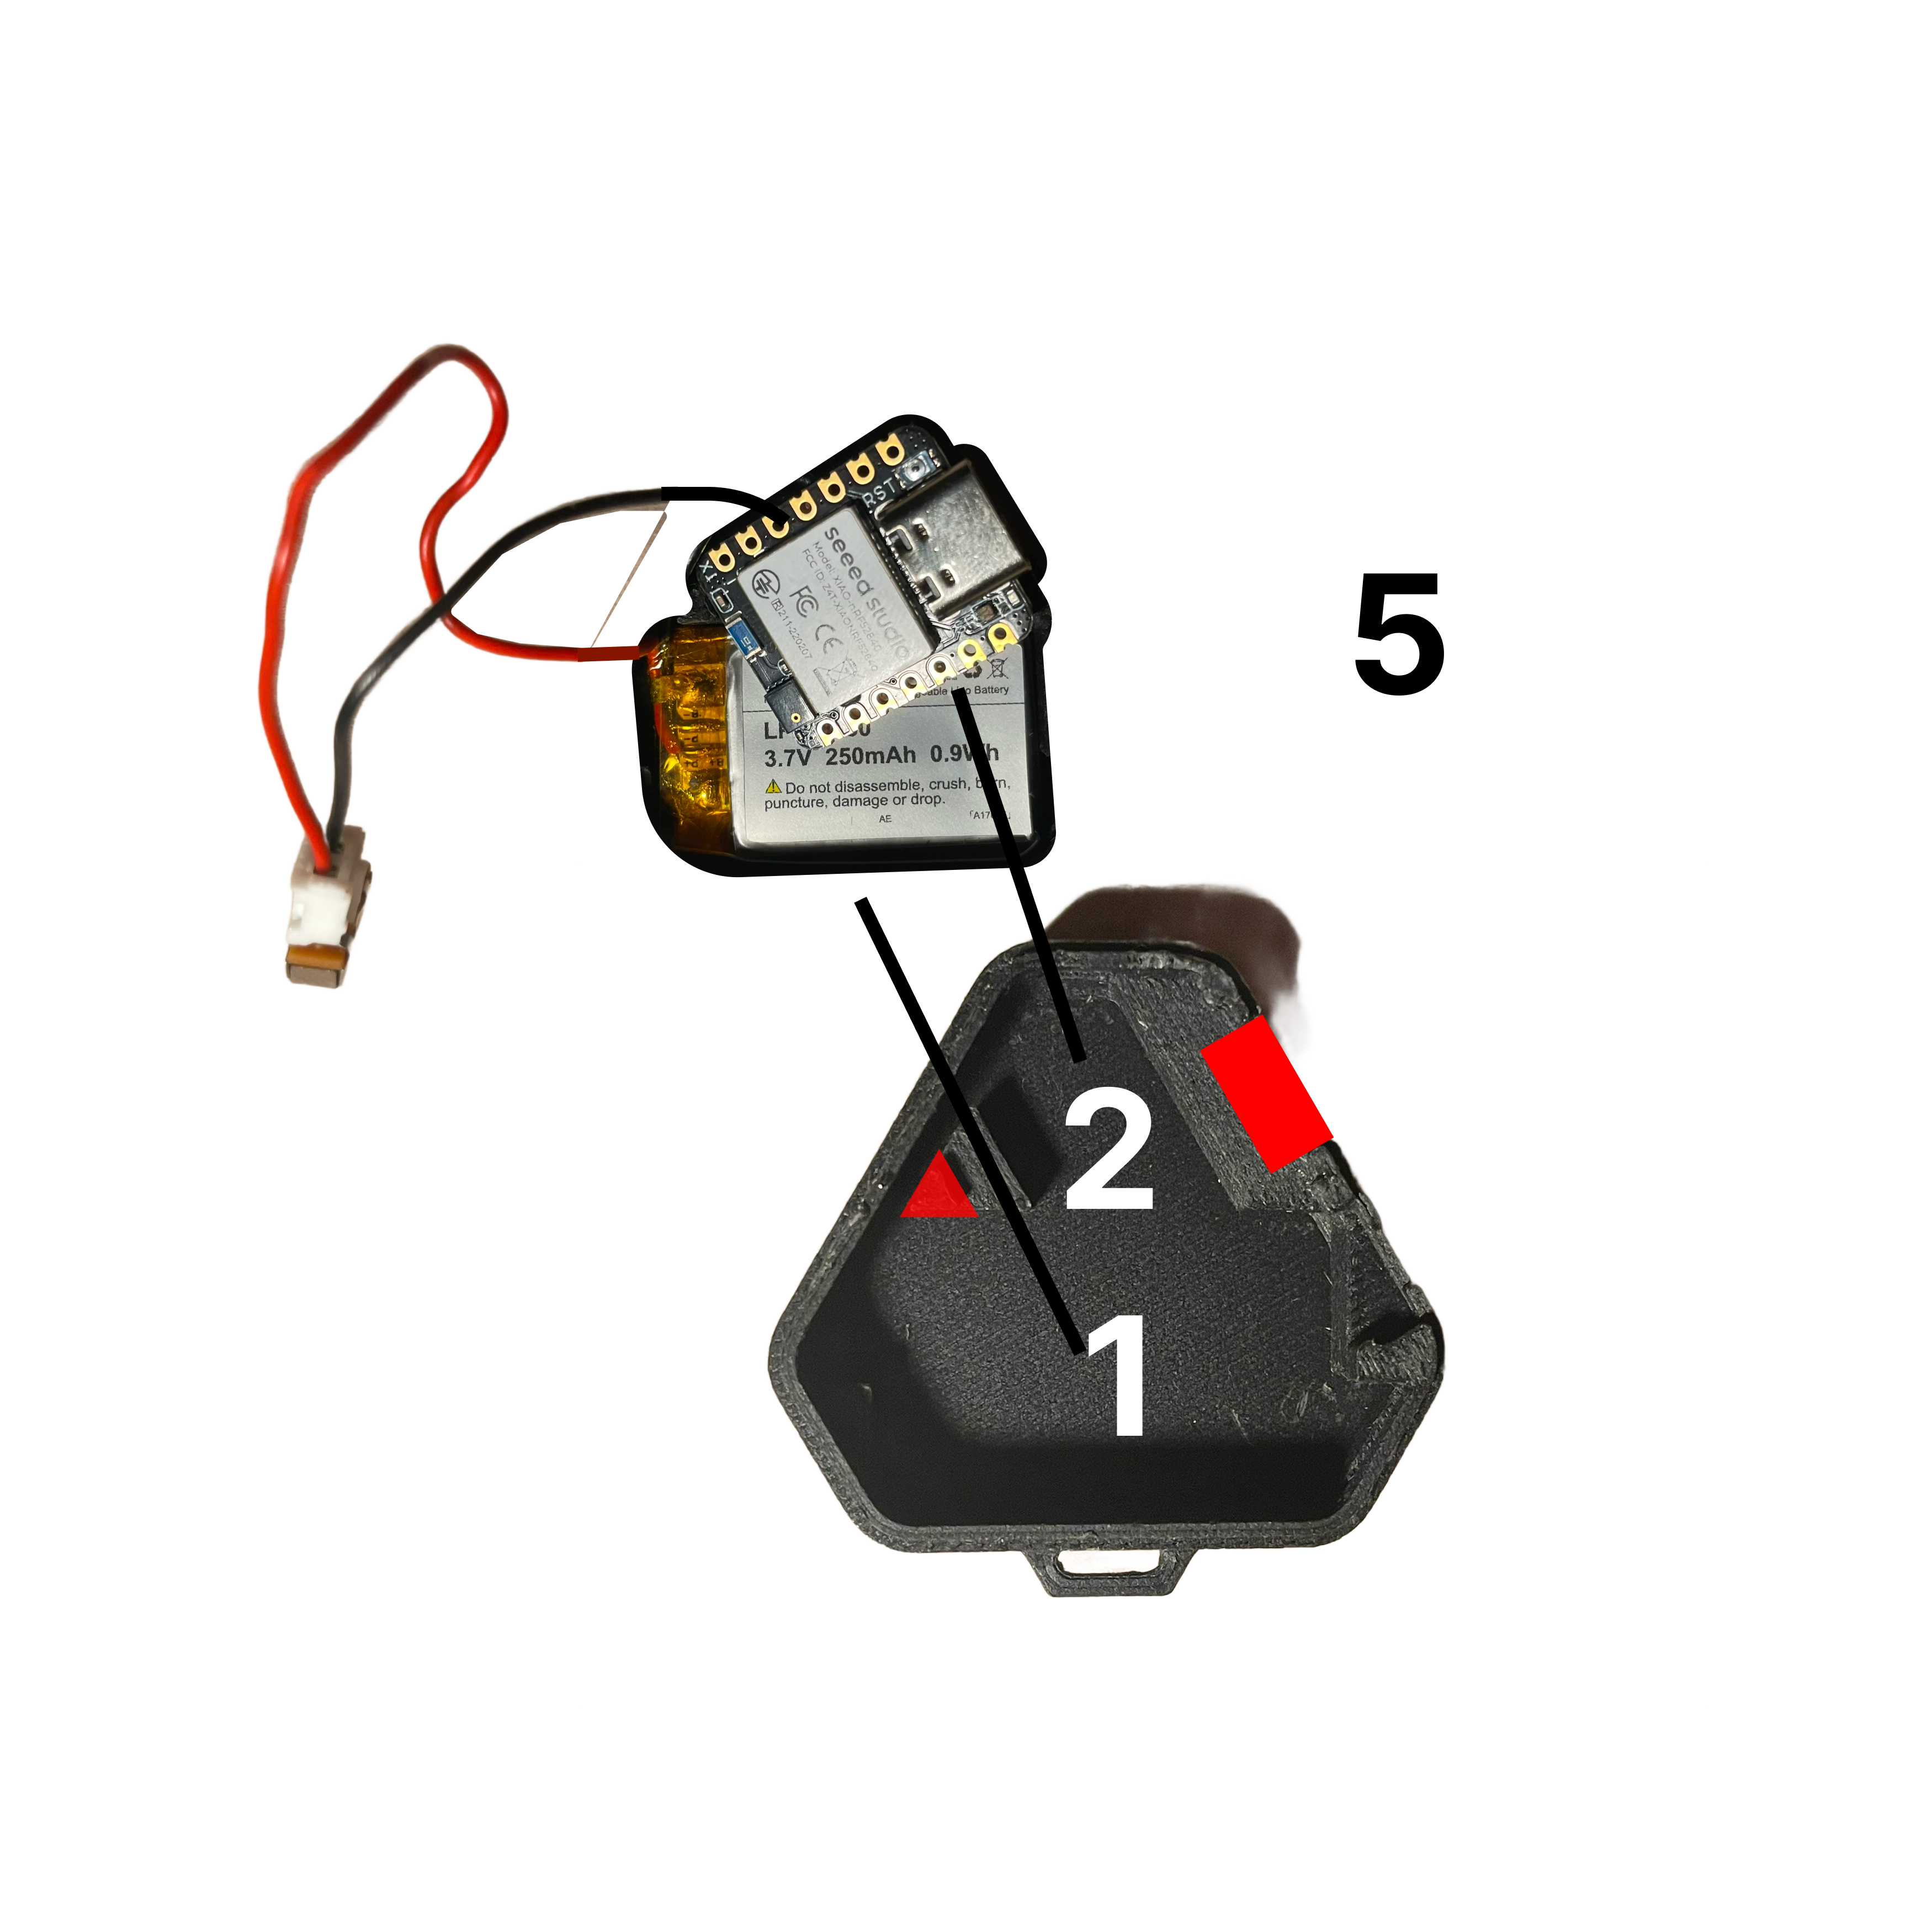
Step 6. Place the switch in the notch next to the USB-C notch
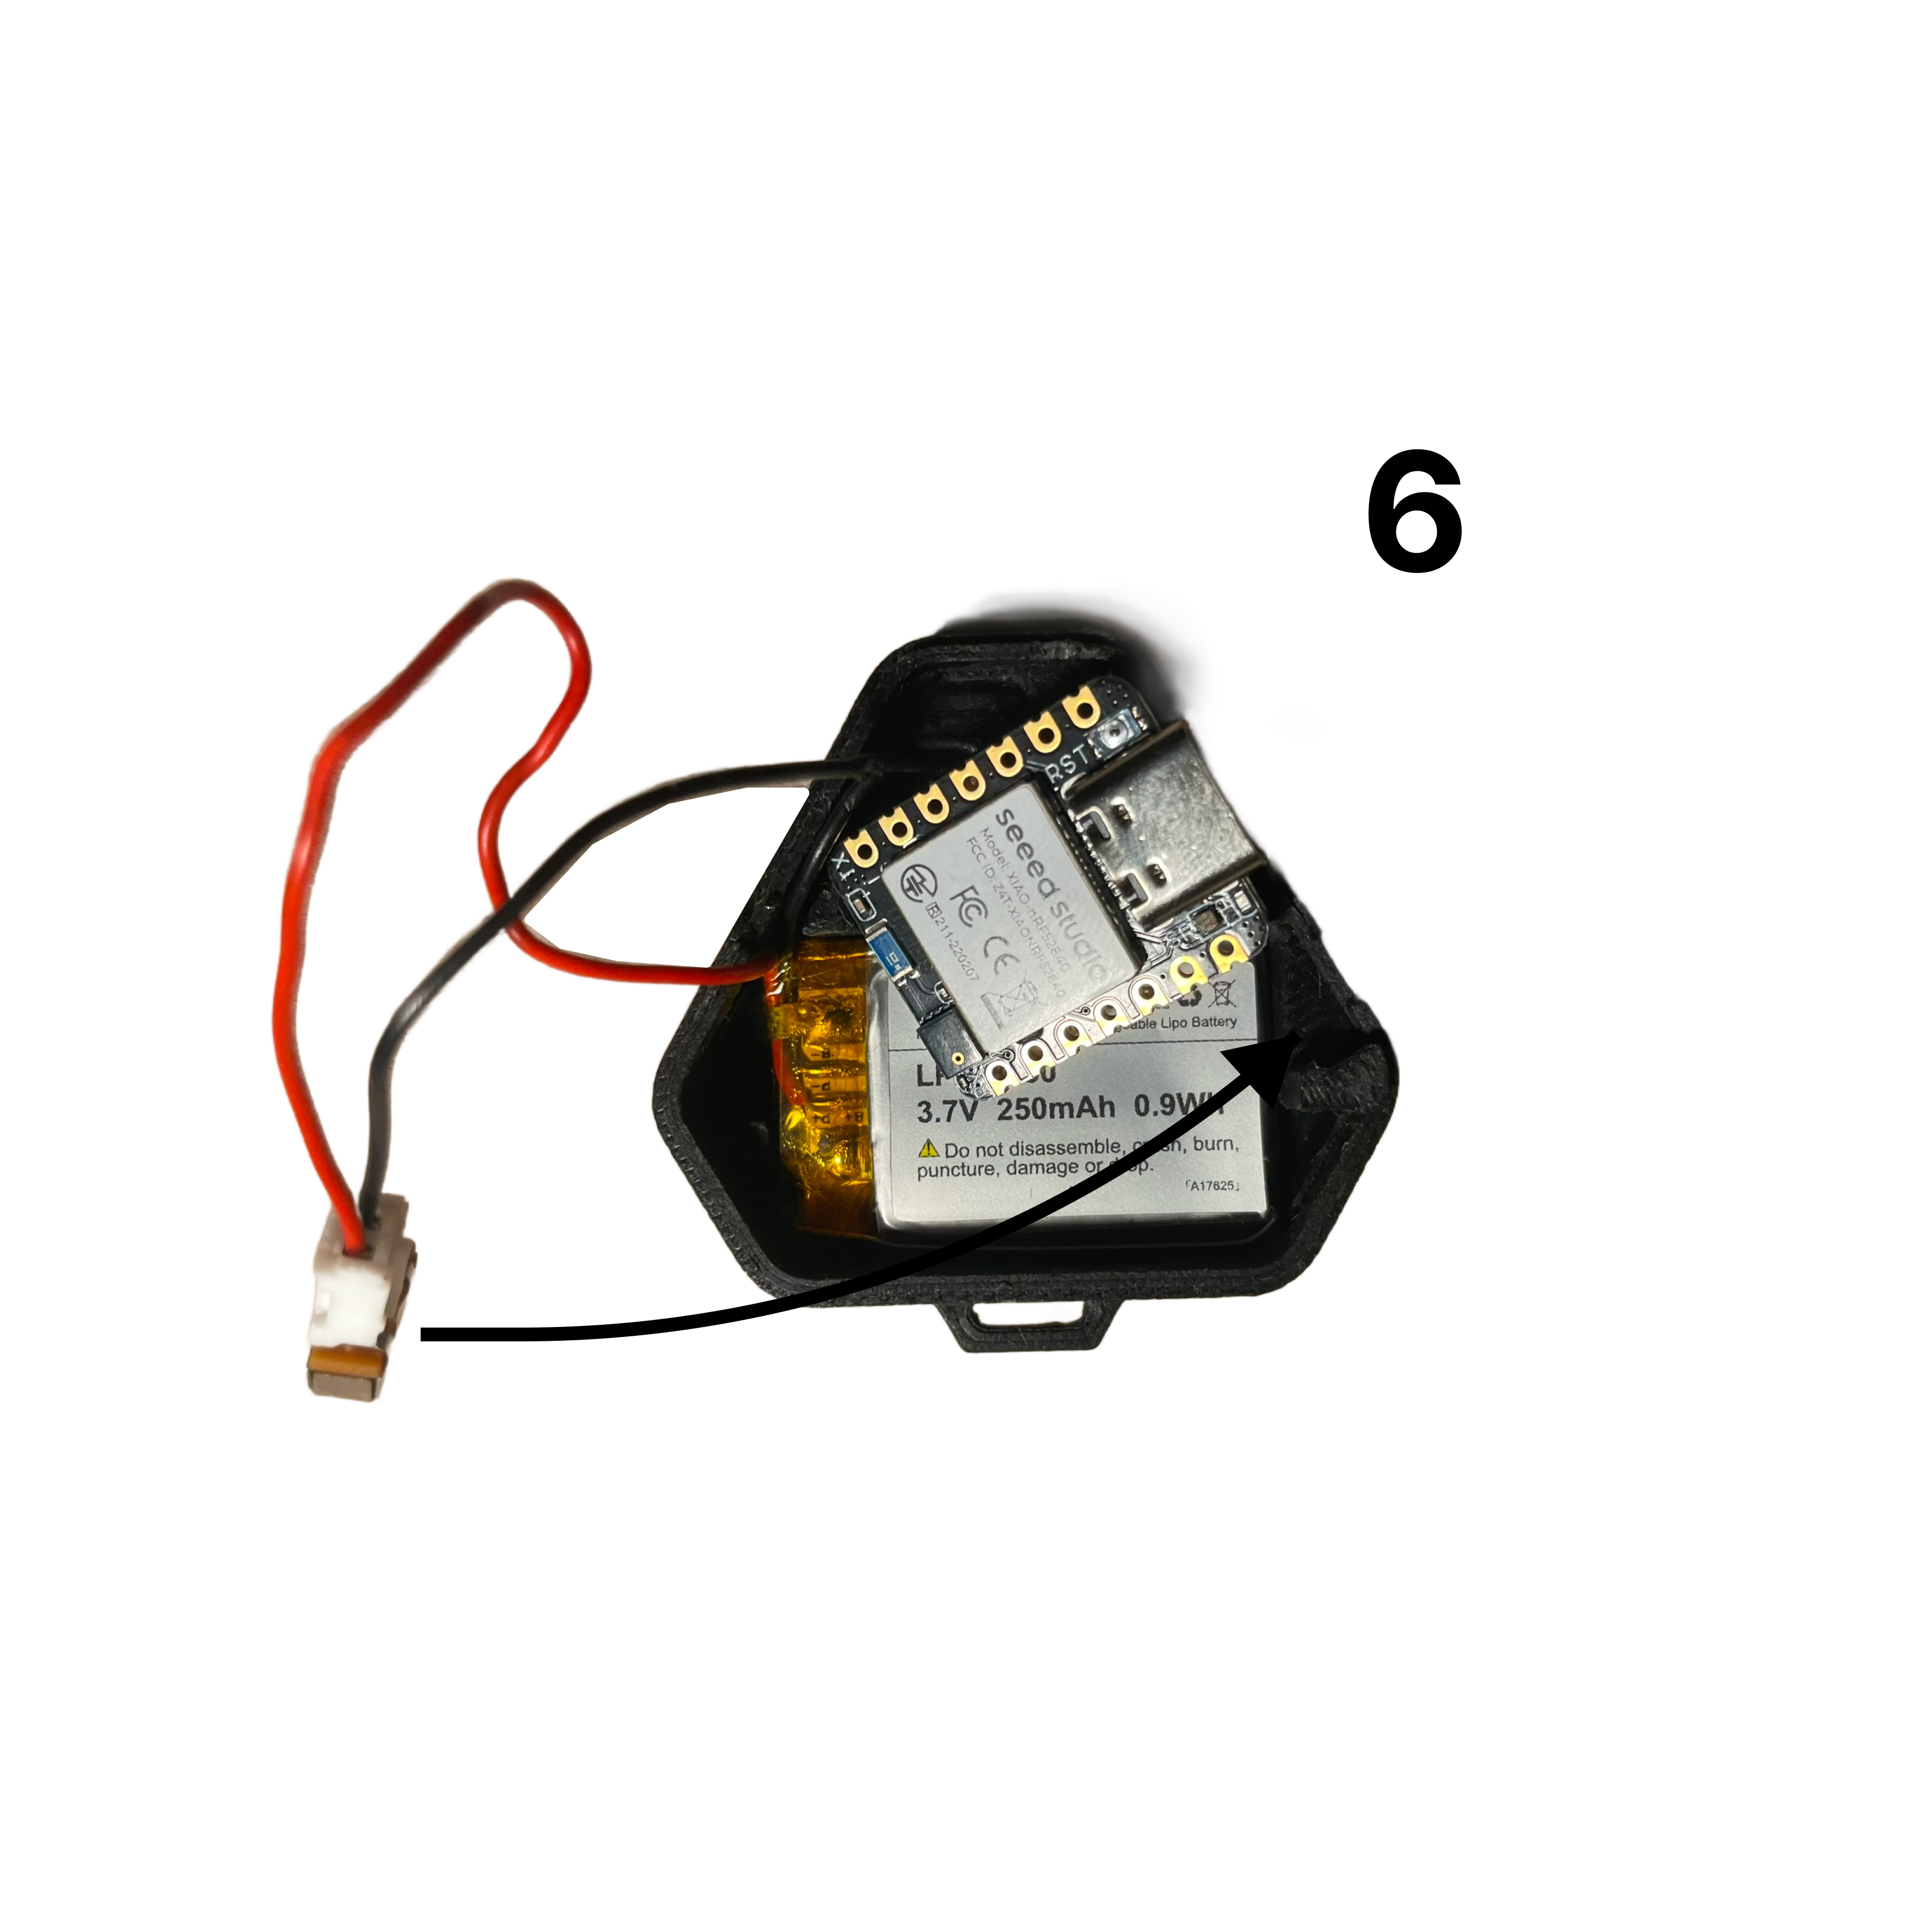
Step 7. Gather the longer red wire and gently twist it.
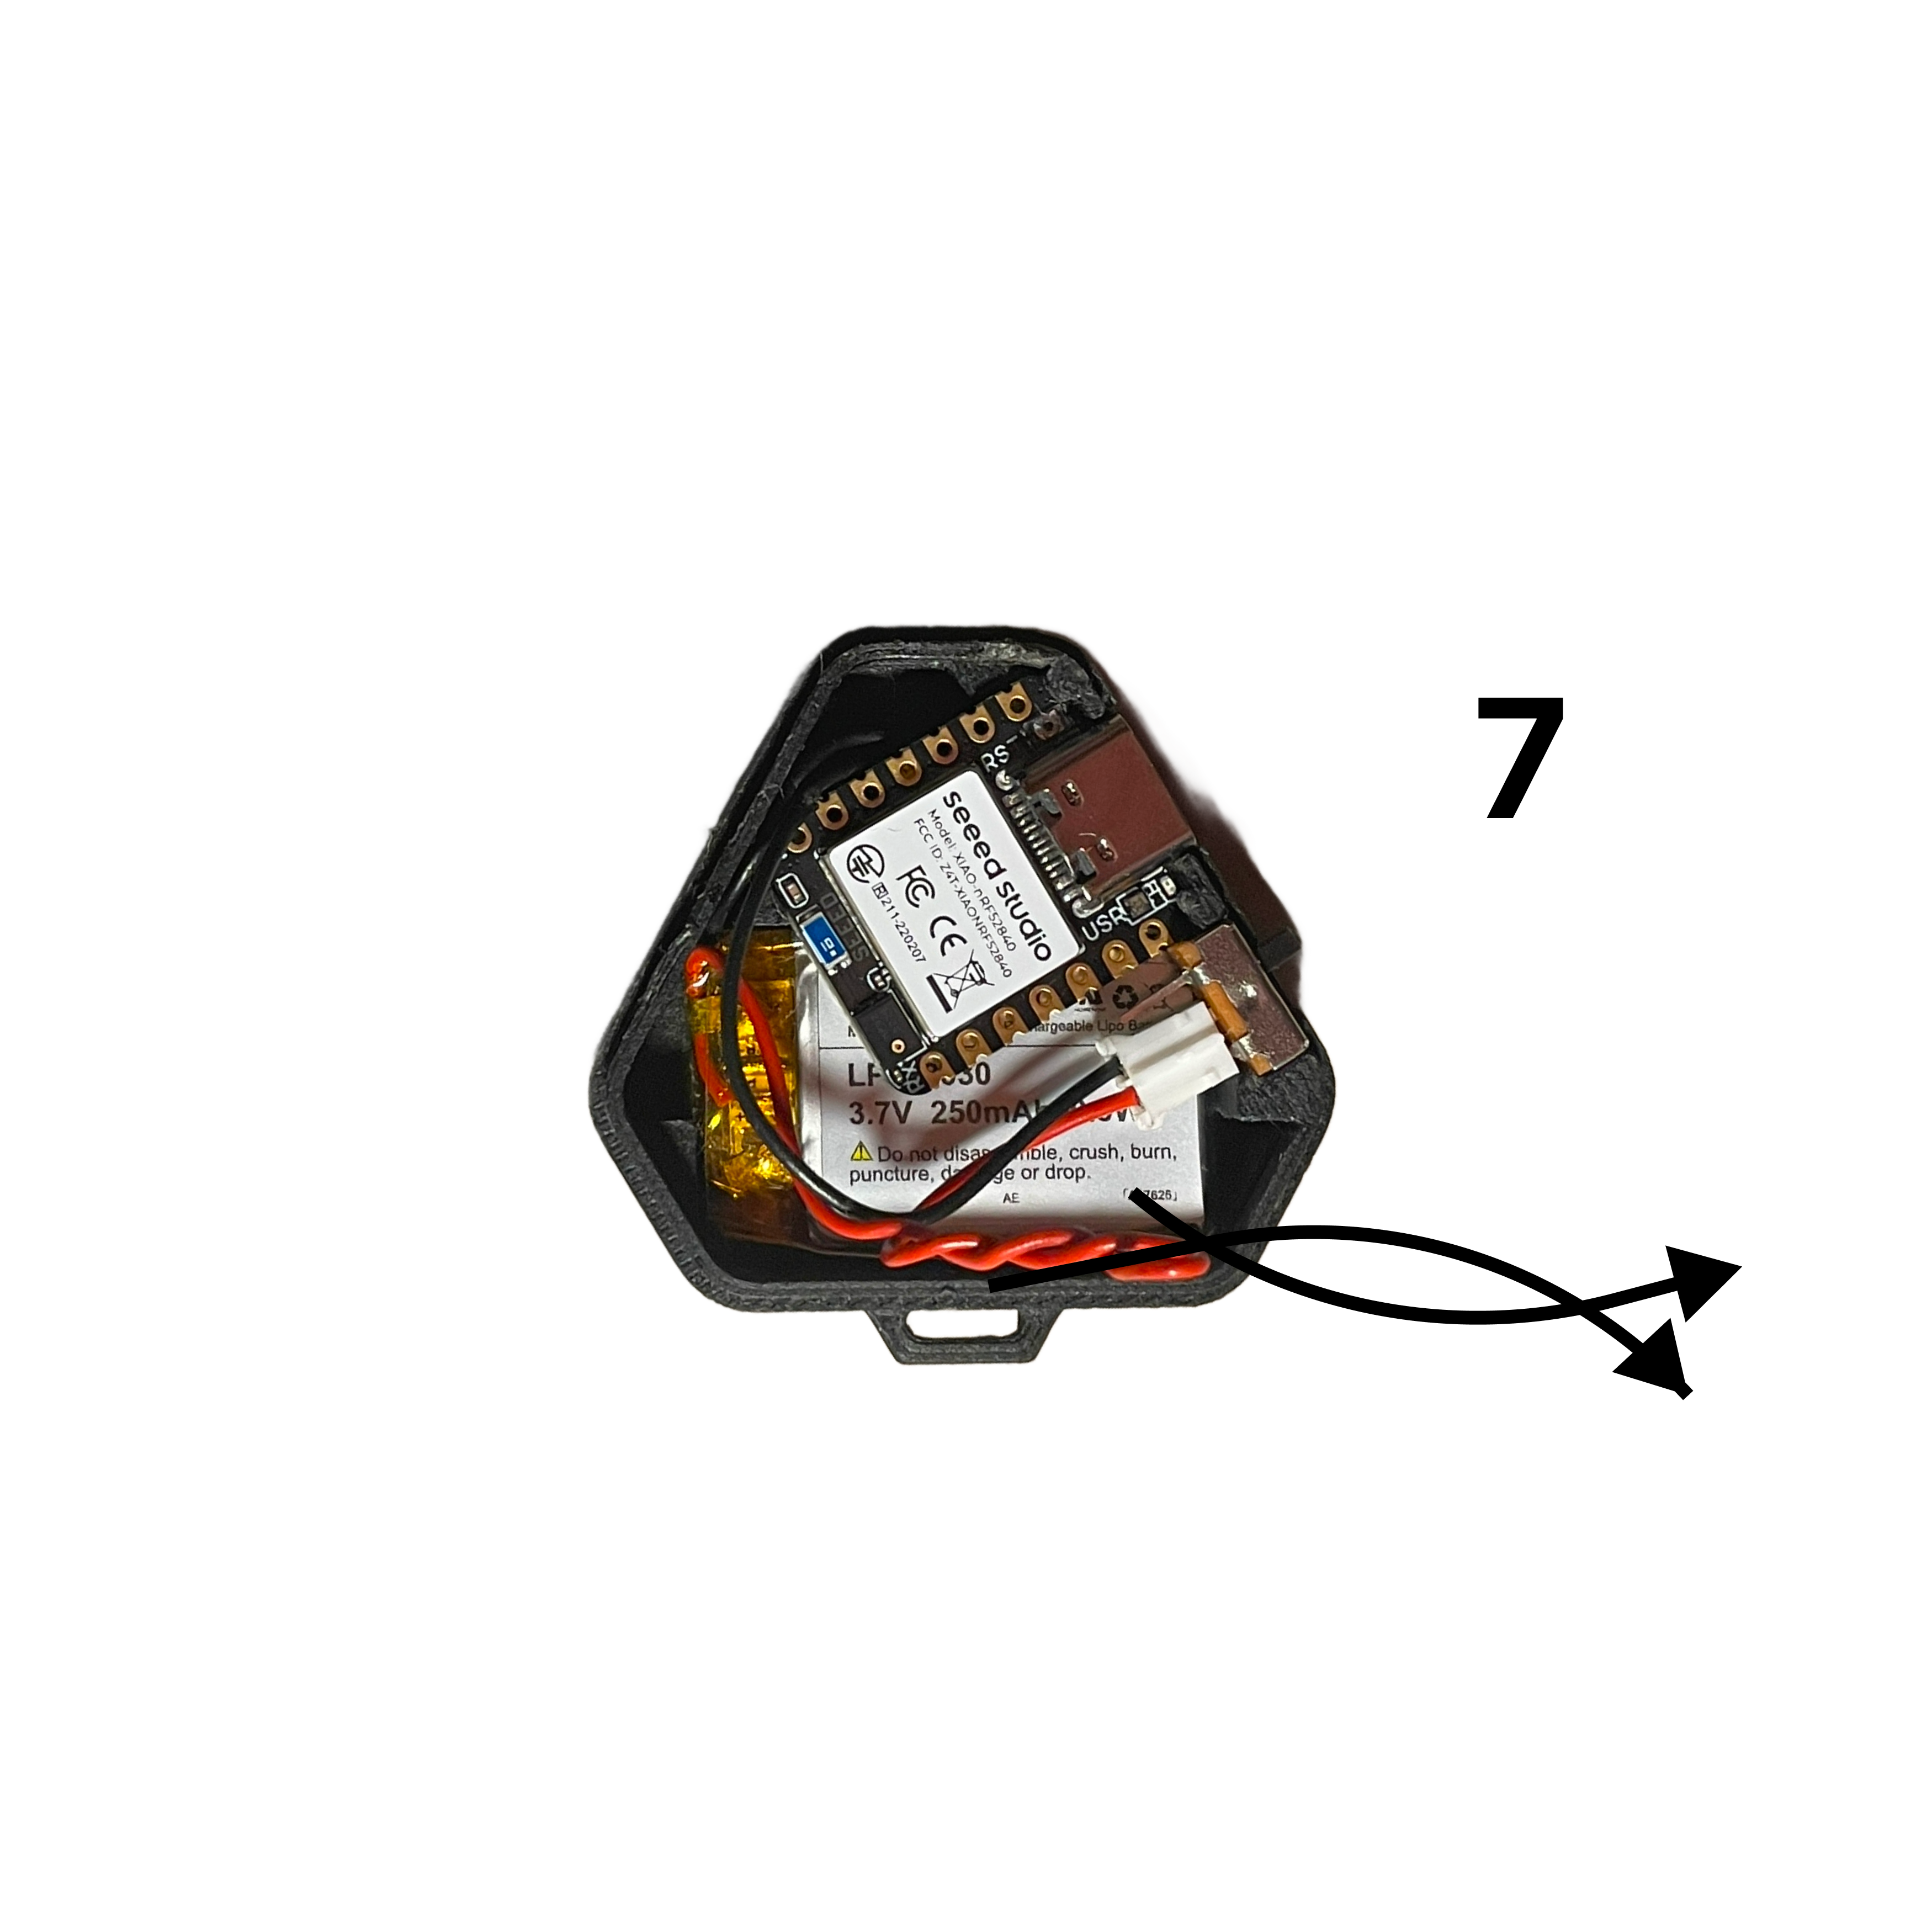
This will help manage the wires when putting on the lid.
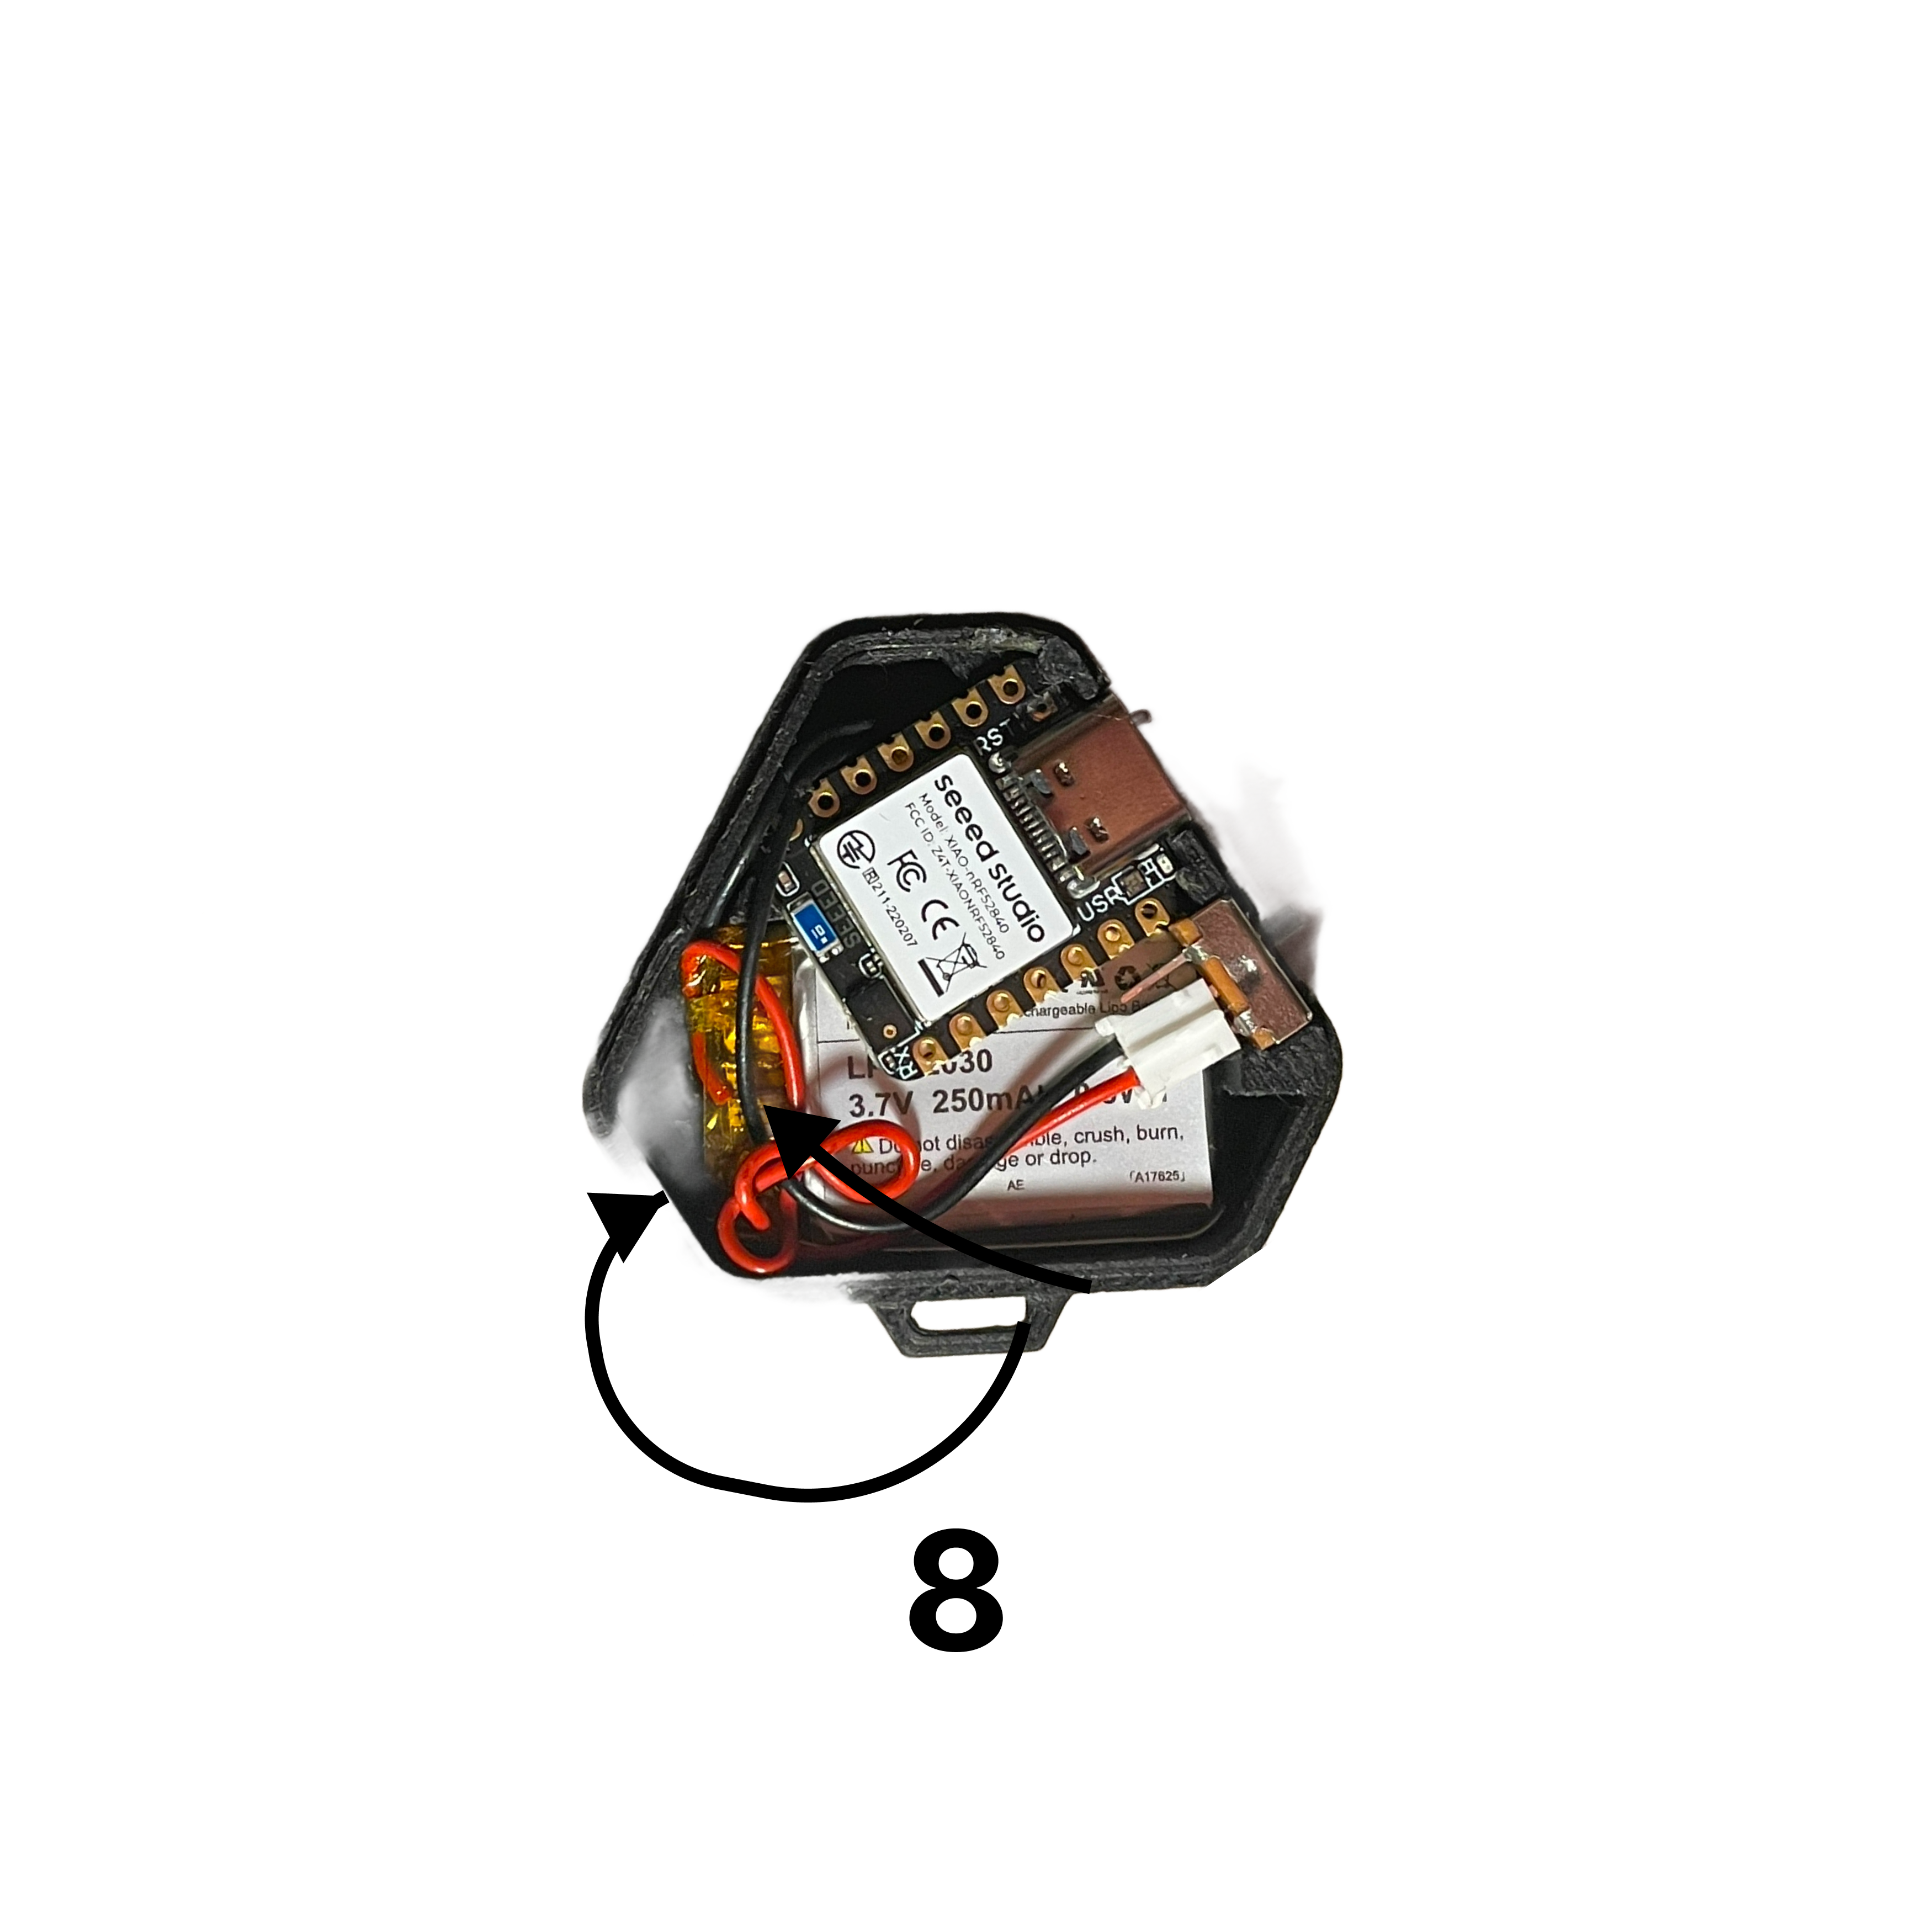
Step 8. Curl the wire and place it off to the side.
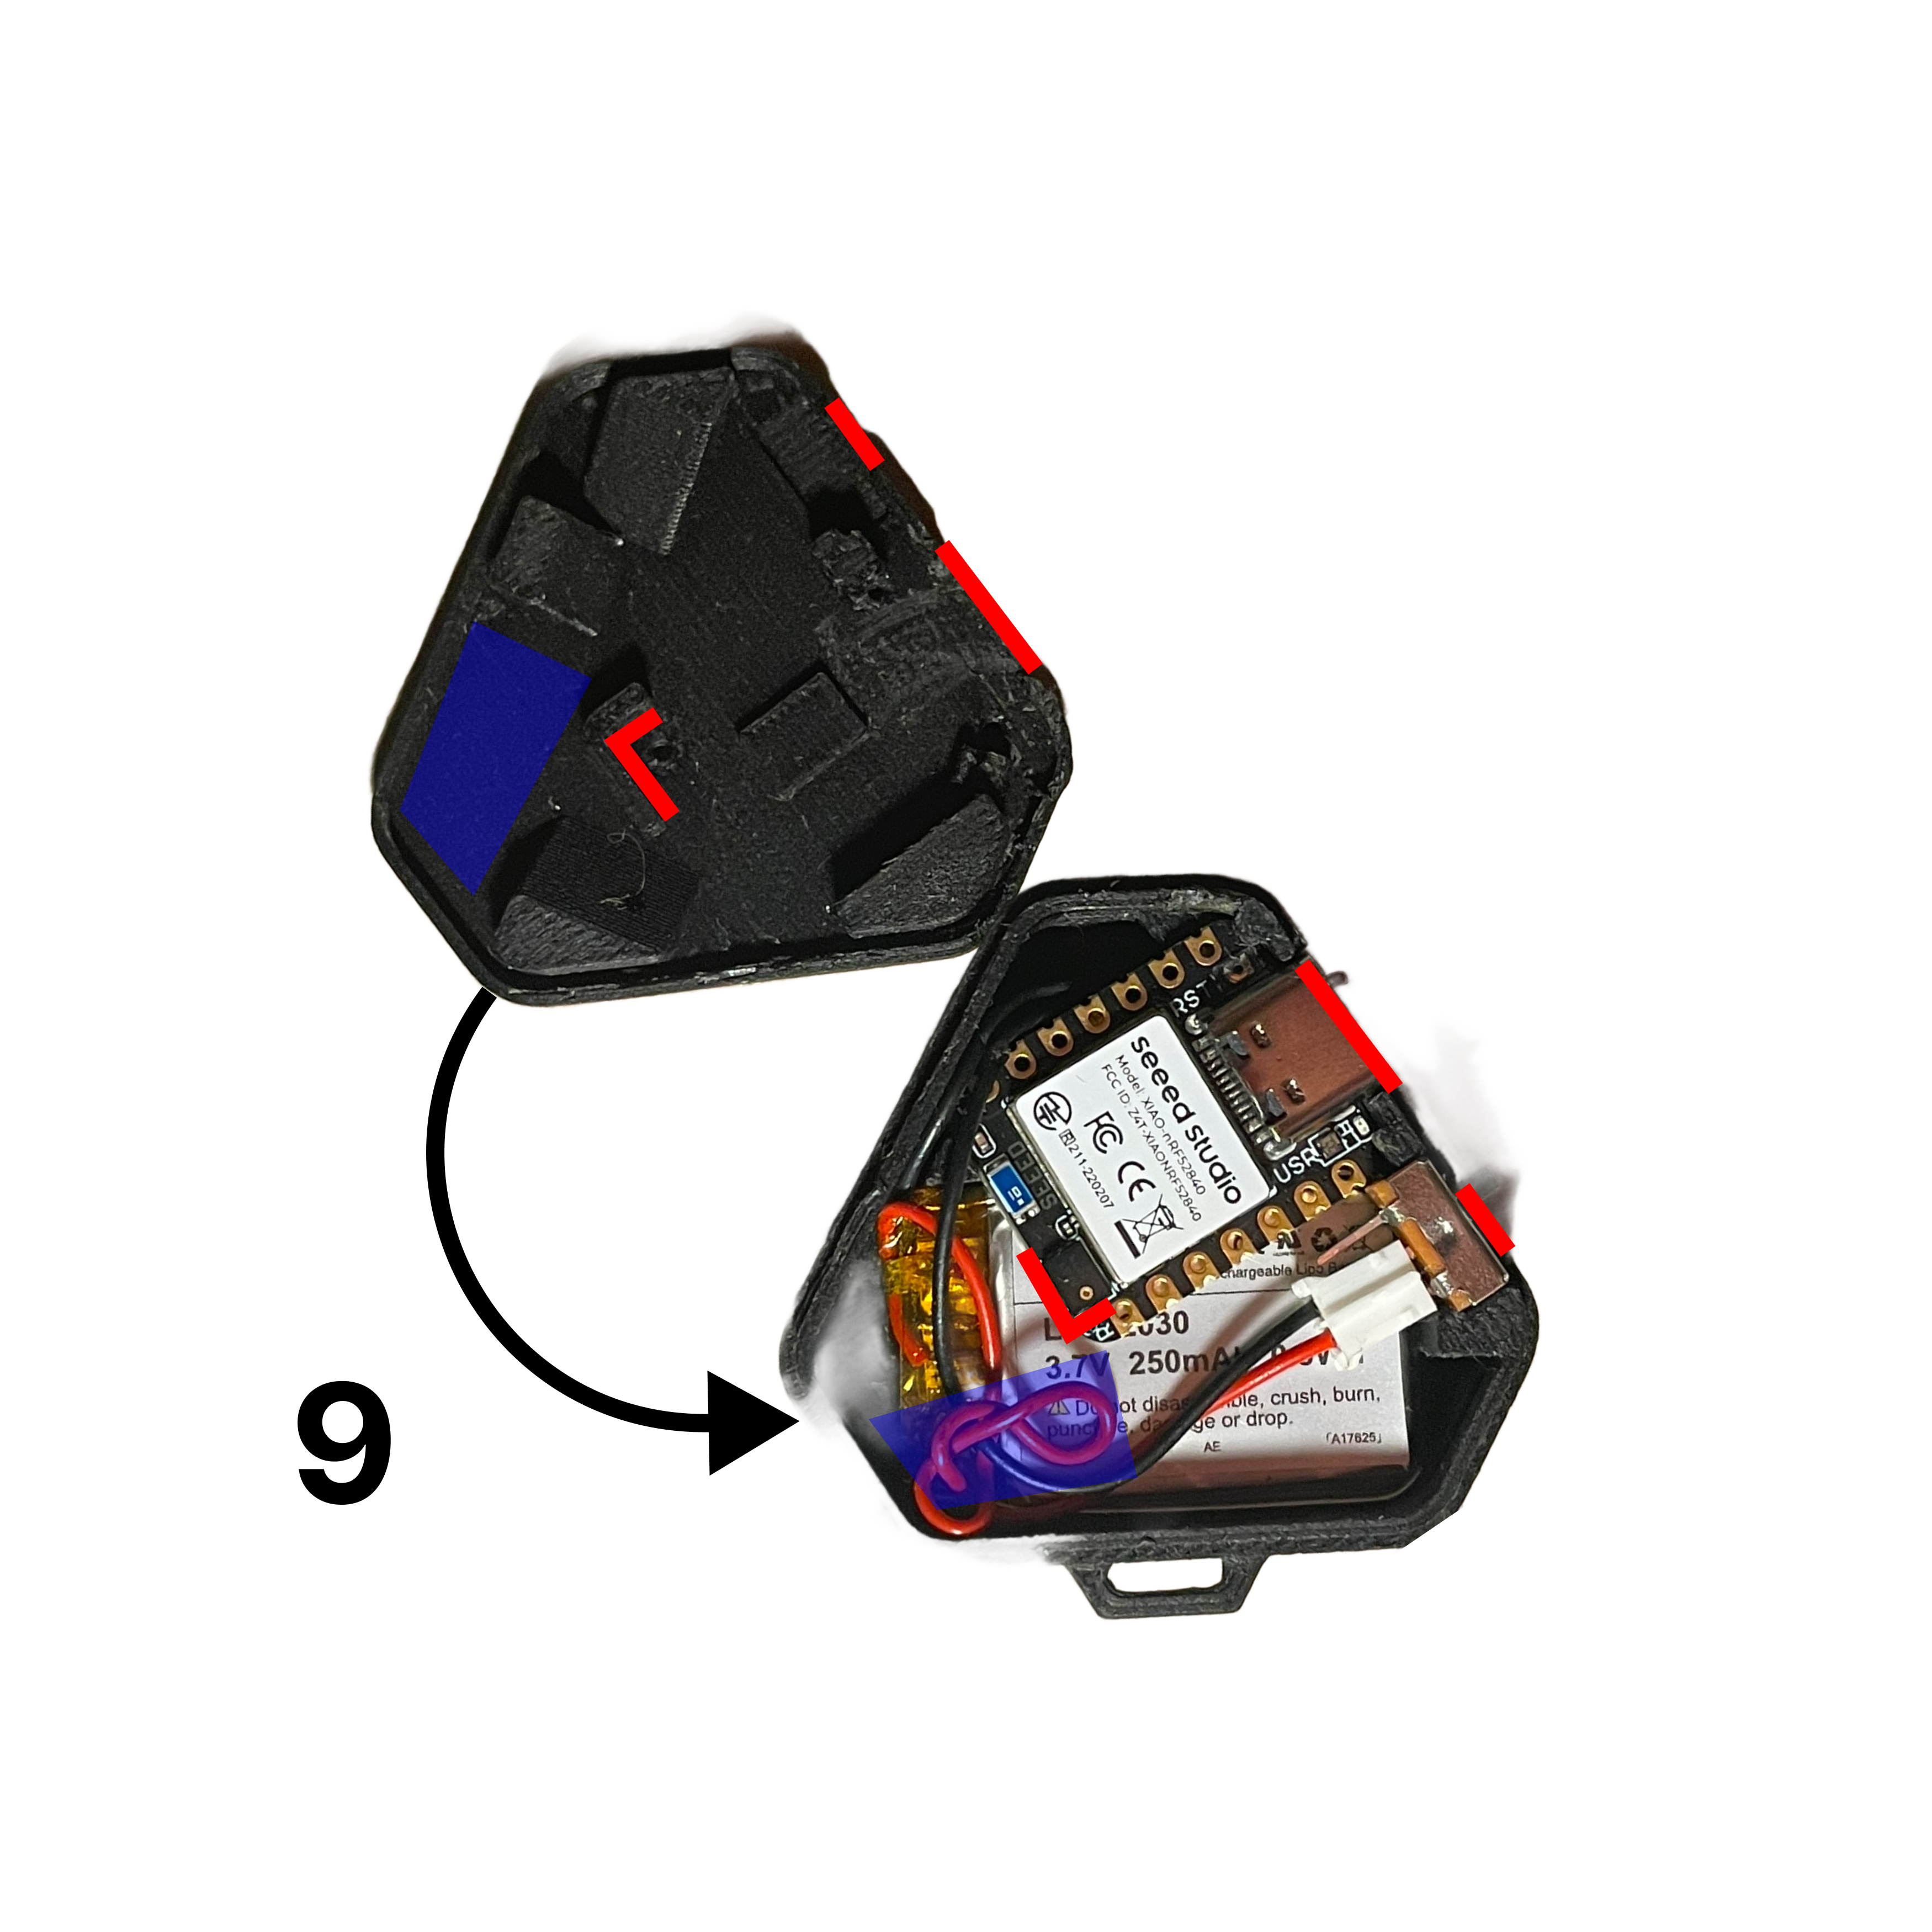
Step 9. Attach the lid to the case.
Attaching the lid may take a few tries; make sure to use the ridges as a guide to find the best placement.
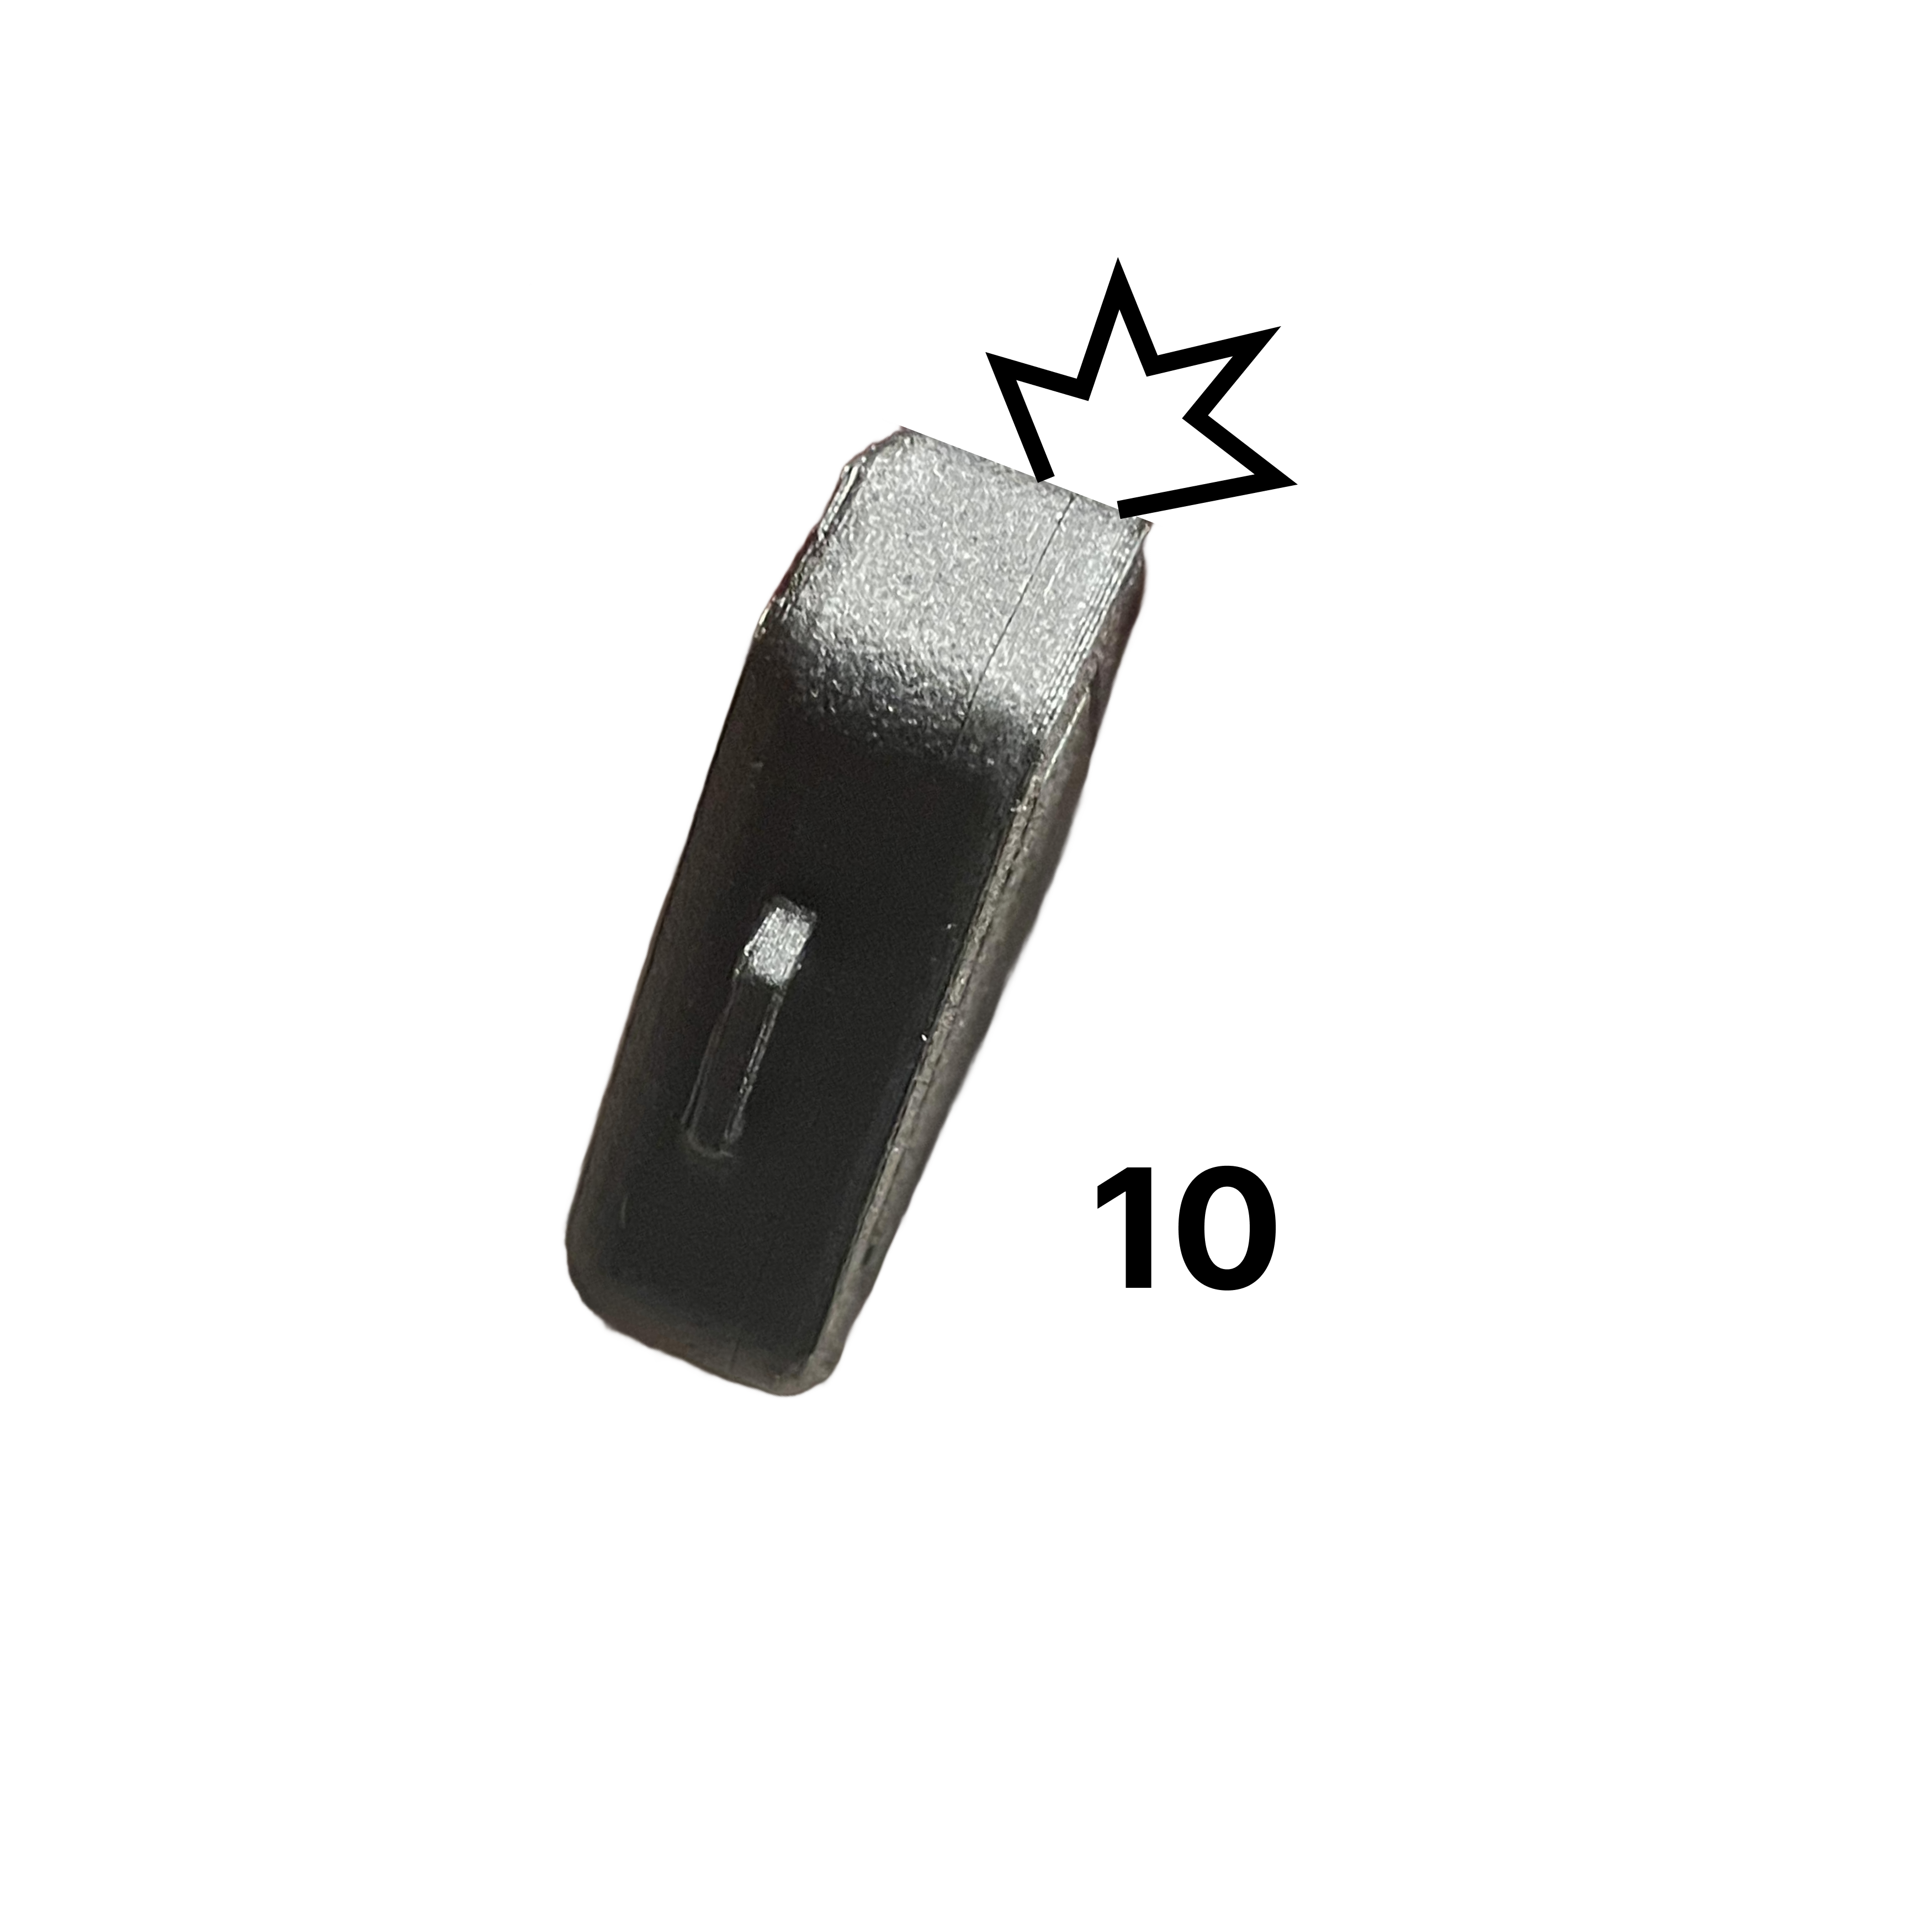
Step 10. Apply even pressure around the perimeter of the case until the seams snap in place.
Step 11. Put the necklace rope This is how we do it
Charging: Friend can only be charged when it’s powered on. It will not be charged when powered off